How to Make a Necesse Server
Necesse is a sandbox action-adventure game where you develop your character and settlement through fighting, mining, exploring, crafting, fishing, trading, and more. The world is procedurally generated, featuring small islands with different biomes, caves, enemies, and loot. Play solo or invite friends for scaled bosses.
Methods of Creating a Server
There are a few ways to play Necesse with friends. Players can either host their worlds in-game or set up a dedicated server. The main benefit of a dedicated server is that it remains online and accessible at all times. In contrast, when hosting a world, the owner must be online and present in the world for others to join.
Renting a Necesse Dedicated Server
Renting a dedicated server from a host is the quickest way to play Necesse with friends, regardless of who is online. Steps vary by host, but we'll outline the Nodecraft process.
Choose the plan you want to purchase. You can view our recommendations here: Necesse Server Hosting. Our checkout process will walk you through, start to finish!
Once you have your server, navigate over to your Dashboard.
Click Create Server

Choose Necesse from the list of games we support.
Click New Save and fill out the requested information.
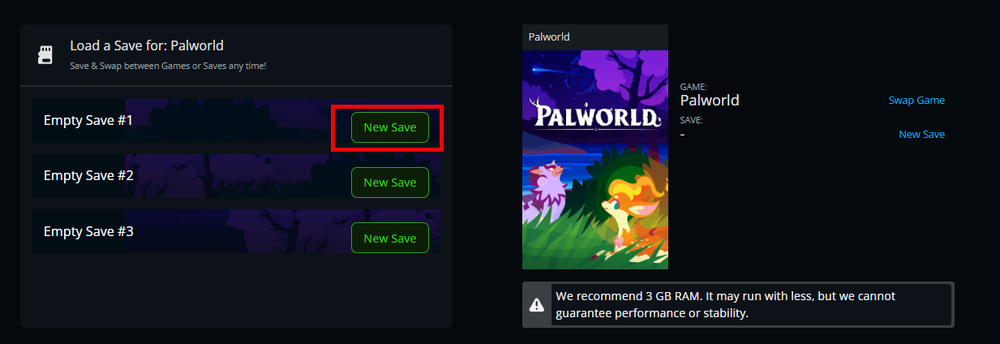
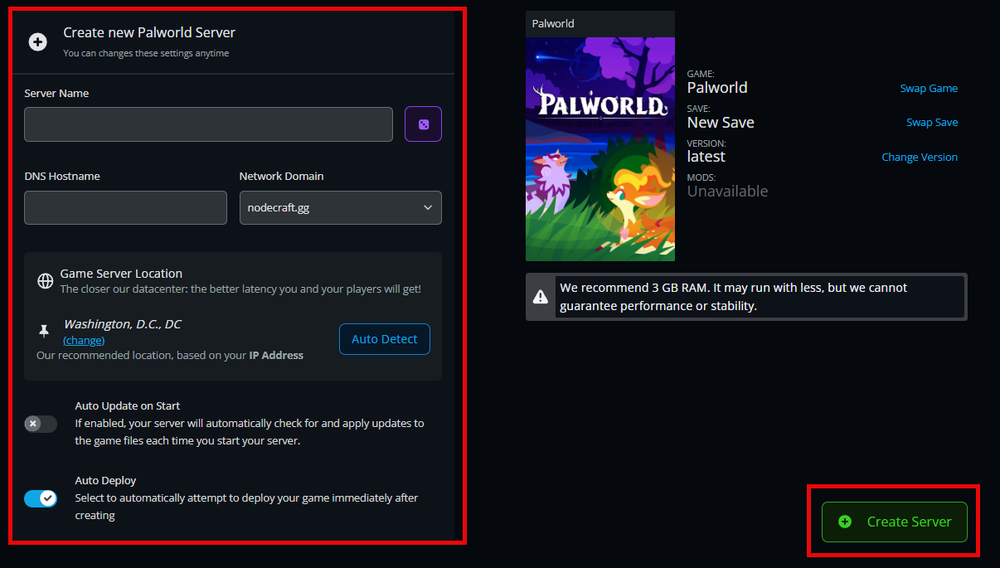
A DNS hostname is a URL-style IP address that players can use to join your server.
Turning on Auto Deploy means your server will set up automatically when you’re done.
Click Create Server.
| Pros | Cons |
|---|---|
| Give trust players access to manage your server | Costs money |
| Give trust players access to manage your server | You have to find a server host you can trust on your own. |
| Ease of Use: Minimal setup required; servers are ready to use almost instantly | |
| Reliability: Professional-grade hardware ensures consistent performance | |
| Support: Access to customer support for troubleshooting and assistance | |
| Customization: Easily adjust server settings and install mods through the server control panel | |
| Save & Swap: Easily save your progress and swap between versions, mods and other games via Nodecraft’s Save & Swap feature | |
| Unlimited player slots: invite as many friends as the game or mods allow |
Self-hosting a Necesse Server
For those who are more technically savvy and willing to put in extra effort, setting up a dedicated server on personal hardware is an option. You can find instructions for this setup on the Necesse Wiki's Multiplayer Page.
| Pros | Cons |
|---|---|
| Unlimited control over server settings and configuration | Requires more time and manual work to set up |
| No hosting costs | Costs of hardware |
| Security for your home connection must be very thorough | |
| Requires technical knowledge to set up and maintain | |
| Your hardware must be reliable and always on for continuous access | |
| Can call for risky third-party programs or punching a hole in your own firewall for others to connect | |
| Requires providing your public IP Address to anyone you want to join your Voyagers of Nera server. Note: Only give out your IP address to people you trust | |
| Requires port forwarding | |
| You may be breaking your internet provider’s terms & conditions |
Host a Local Server (Peer-to-Peer)
Hosting a world in game is a quick option for anyone who does not need the server to be accessible to other players when they are not online.
Open Necesse.
Click Play Multiplayer.
Click Host World.
Choose an existing world or Create new World.

Select the World type and give it a name, and press Continue.

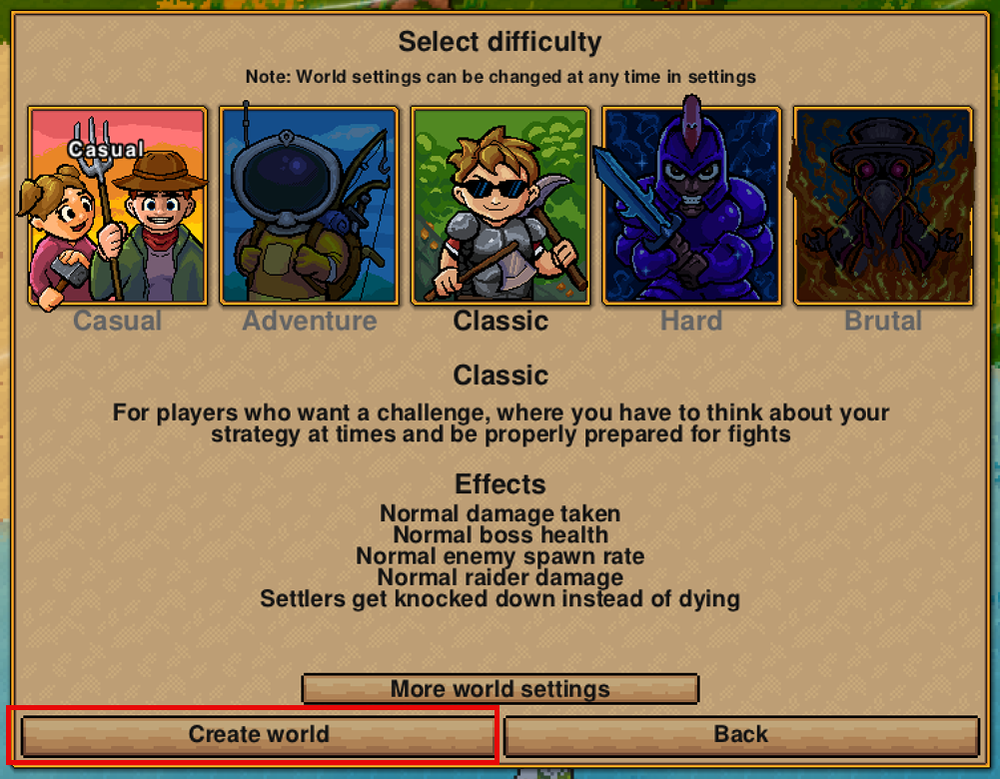
Choose the difficulty, and then either click Create world or More world settings if you'd like to configure more advanced world settings.

Set up your player settings, server visibility, and server password, then press Host to get started.

Choose or Create a new character to finalize the process and launch the server.

Once in game, press Escape to open the menu, then click Invite Friends to invite your steam friends to your locally hosted world.

| Pros | Cons |
|---|---|
| Quick and straightforward setup | Your computer must remain on for the server to be accessible |
| No additional software or costs involved | Limited to your hardware capabilities and internet connection |
| Potentially higher latency for distant players |
Conclusion
Now that you've learned the various ways to play Necesse multiplayer, create a server today and play within minutes with Nodecraft Necesse Server Hosting!
Need Help?
If you have questions or run into any issues, our support team is here to help! Reach out using the support widget on our website or visit our support center for further assistance.