Adding the Whitelist Plugin to Your Rust Server
This article will show you how to install and setup the Whitelist uMod plugin if you want to have a private Rust server.
Install uMod
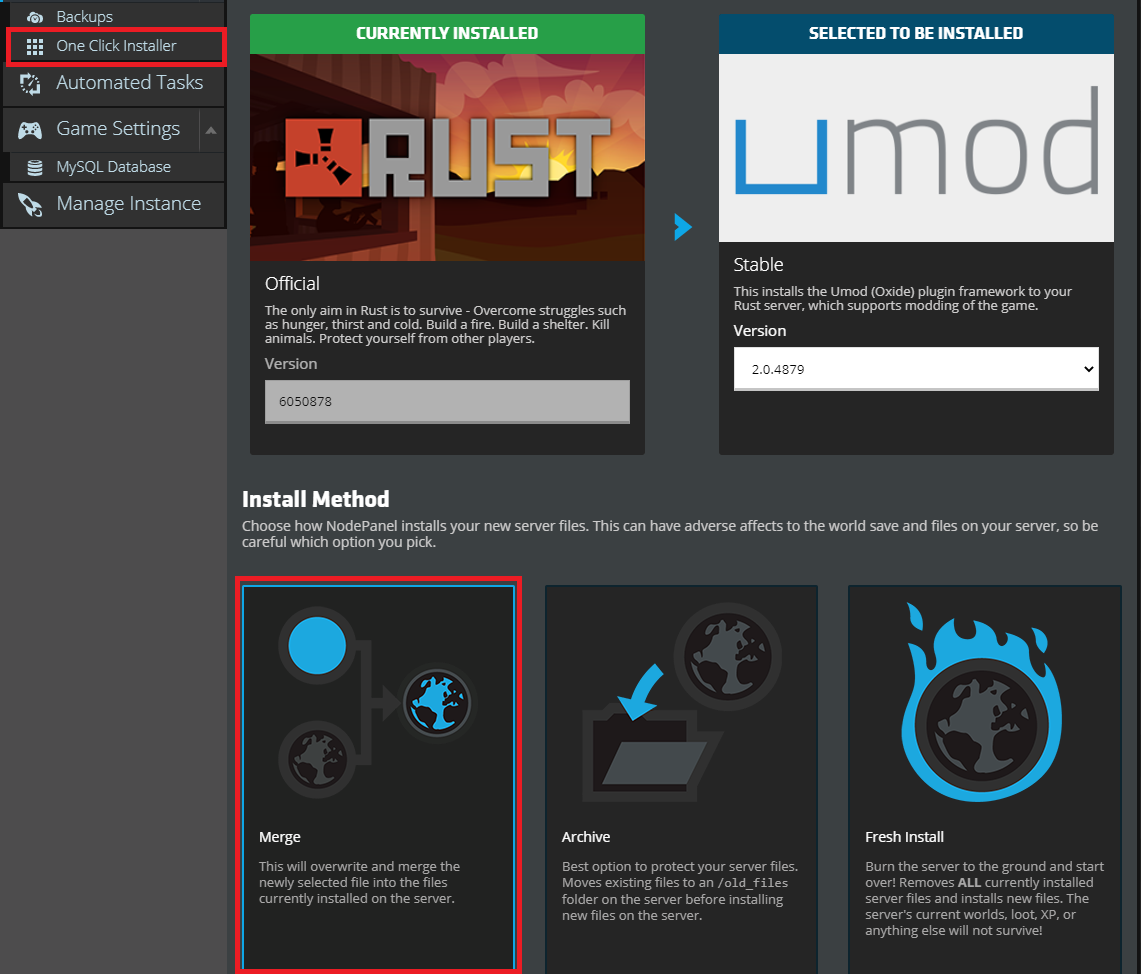
You will need to install the uMod plugin framework on your Rust server. Here at Nodecraft, we have added that as a choice in our One Click Installer for you. Select uMod in the One Click Installer, and make sure it's on the default installation method, "Merge".
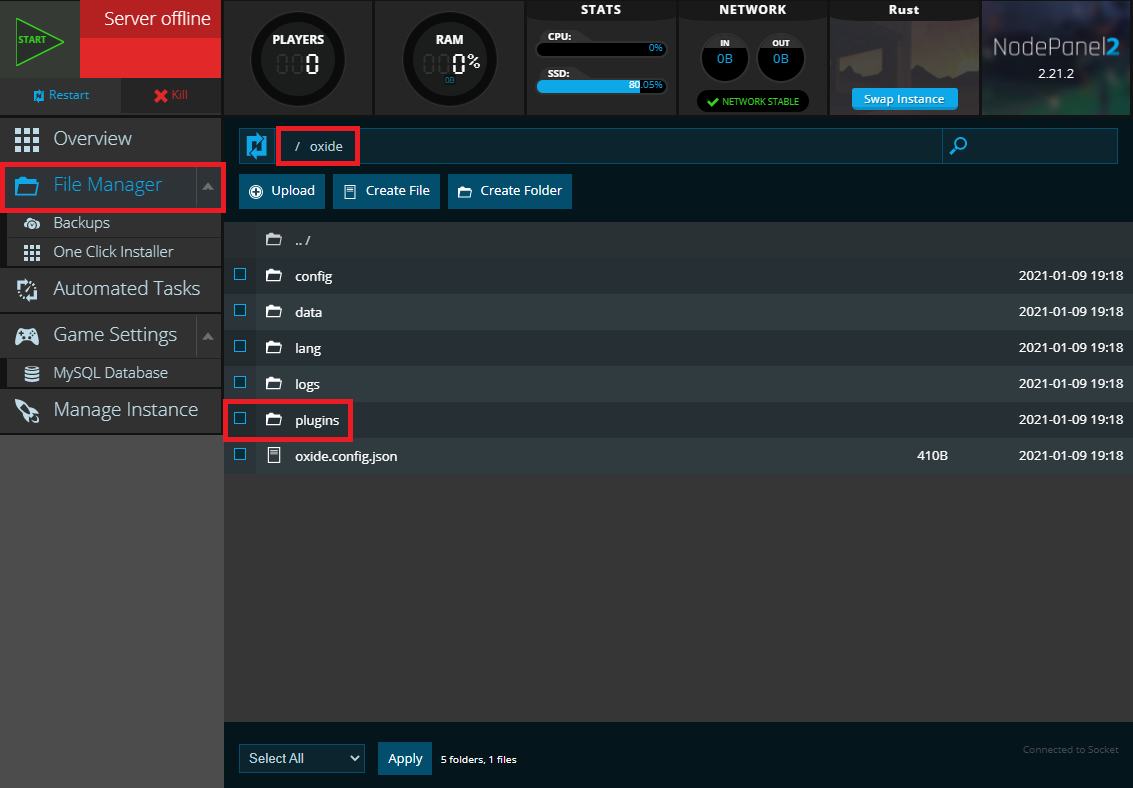
After uMod is installed, start the Rust server, let it finish loading, and then shut it down. This will cause the server to create an "oxide" folder, with many sub-folders inside, including the "plugins" folder where you will place all the plugins (and you will need that for the next step).
Get the Whitelist Plugin and Upload it to Your Server
While there are several whitelisting plugins for uMod, this guide will focus on one of the most commonly used ones, which is Wulf's Whitelist. The plugin can be downloaded at https://umod.org/plugins/whitelist . It will download as a file called Whitelist.cs.
On your NodePanel, navigate to the File Manager. Find and open the oxide folder, then open the plugins folder. Now you will upload the Whitelist.cs file here.

Note: as soon as the Whitelist plugin is on your server and you have restarted, it will refuse any players who aren't already allowlisted. So until the rest of the setup is finished, no one will be able to join the server.
Any players who attempt to connect will see the normal "connection established" screen appear in the Rust client, and disappear almost instantly. If you have an active RCON connection at the time, you will see a message in RCON that they were refused connection because they aren't on the allowlist. Since Rust doesn't have a console, you won't see any other messages except in the RCON tool.
Setup an RCON Tool
Rust has no console, so there's no normal way to issue commands to the server from inside the game, or from the Nodecraft control panel. To issue commands, you will need to use what is called an RCON tool, which stands for "remote console". The RCON will create a two-way connection with the server, allowing you to send it commands, and then see output and confirmations from those commands running.
If you've never setup an RCON tool before, we have an article guiding you through this process using the popular RCON tool RustAdmin: https://nodecraft.com/support/games/rust/setting-up-the-rust-admin-rcon-tool
Set Yourself as Owner of the Rust Server
You will also want to be add yourself as a server owner to your server; being an owner is the highest form of a server admin for Rust.
If you have not done so yet, we also have an article that will help you through this process: https://nodecraft.com/support/games/rust/become-admin-on-a-nodecraft-rust-server
Add Players to the Whitelist Plugin
To add a player to the Wulf's Whitelist plugin, use the following command in the RCON command line box:
oxide.grant user (Steam64ID/username) whitelist.allowIt will look something like this, as an example:
oxide.grant user 76561198047699606 whitelist.allowWhen players have the whitelist.allow tag in their permissions, it will allow them to join the server. Adding users one at a time like this is best for smaller servers. If you have a very large number of players, it might be more efficient to create "groups" in the permissions system built into uMod, and then simply assign players to those groups. You can change the permissions of many players at once, by just changing the one group they all belong to you.
For more information about using groups you can check out our other article about uMod's permissions system: https://nodecraft.com/support/games/rust/umod-oxide-permissions-system
uMod's website also has great documentation on some of the more intricate ways you can setup the permissions system in a way that suits your needs.
Remove Players from the Whitelist Plugin
You can remove someone from the whitelist by using the command:
oxide.revoke user (Steam64ID/username) whitelist.allowThat removes the whitelist.allow tag, and they will then be blocked from re-entering the server.
Congratulations! You've setup an allowlist on your Rust server!
Need Help?
If you have questions or run into any issues, our support team is here to help! Reach out using the support widget on our website or visit our support center for further assistance.