Uploading an Existing World to your Minecraft Server
Uploading a singleplayer world to a Minecraft server allows you to continue your gaming experience with friends or a larger community. In this guide we will show you how to upload singleplayer worlds onto any server!
Note: Before uploading any files, be sure that your Minecraft server is fully stopped!
Locating Your World
Open your Minecraft Launcher
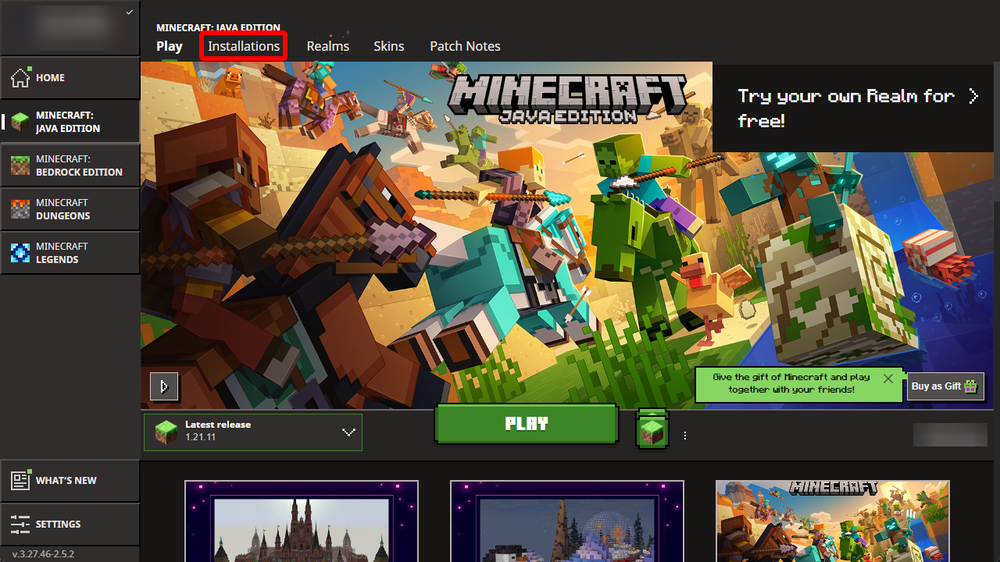
Once the launcher loads, click on the Installations tab.
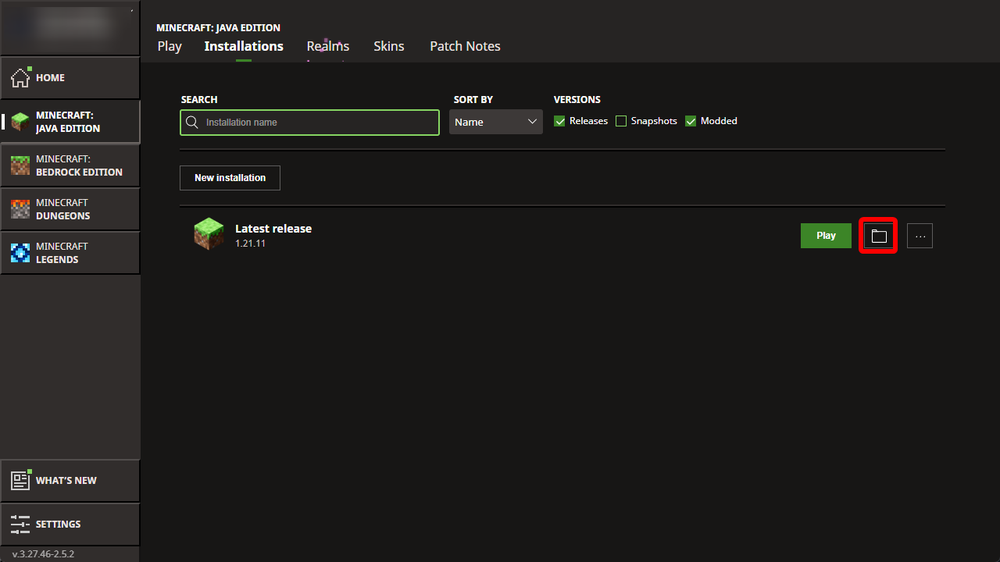
If you have more than one install, find the version you were playing the world on. If you don’t have more than one, it’s normally the Latest release install. Click on the folder icon to open the installation folder.
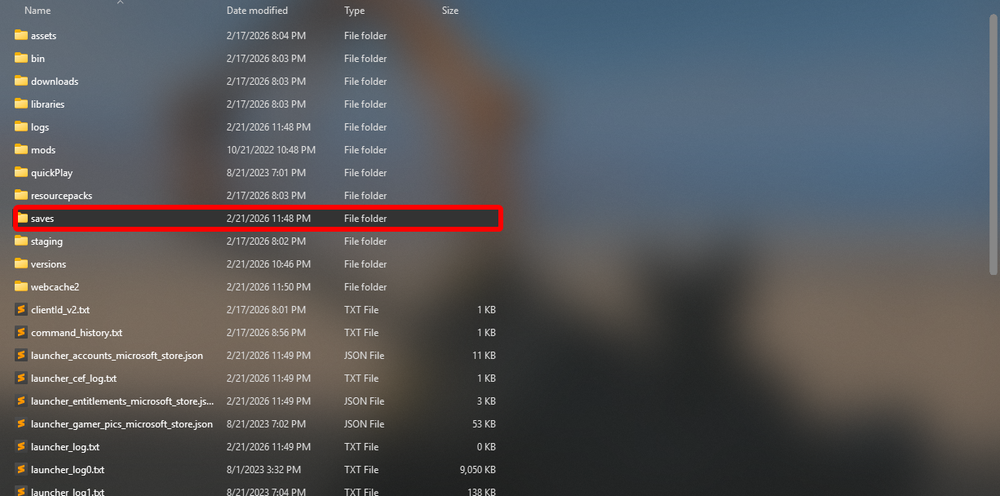
When the installation folder is open, open the saves folder.
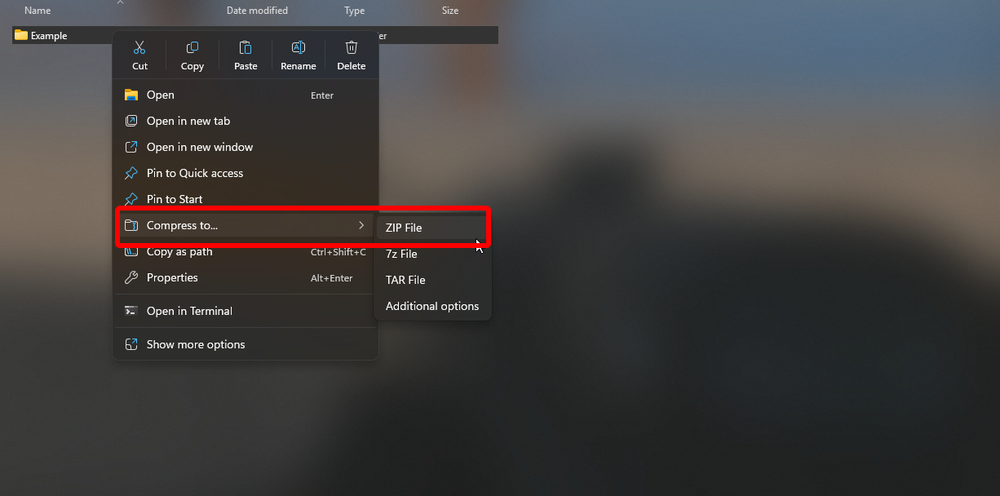
Locate the world you want to upload, right click it and select Compress to.. > ZIP File.
Once you have the zip file, open your dashboard, locate your Minecraft server and click on the Panel button.
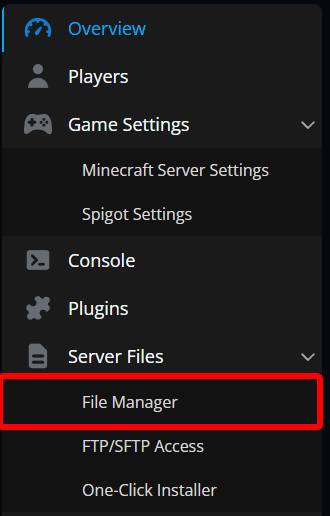
From your panel, click on File Manager from the sidebar.
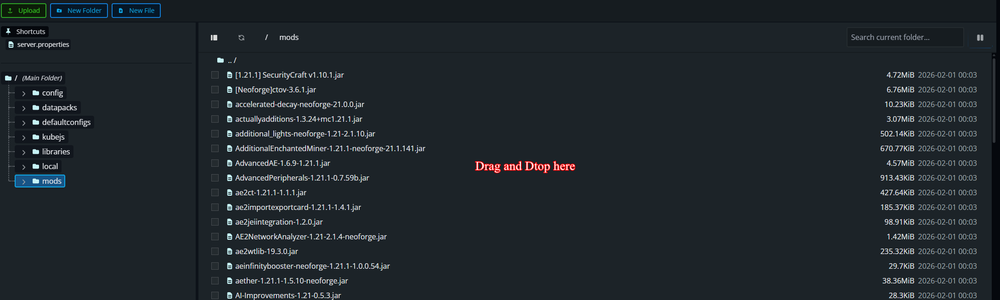
In the File Manager you can Drag and Drop the zip file into your Main Folder.
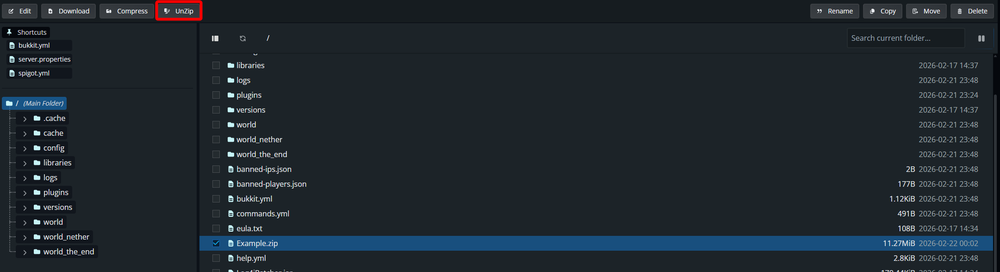
When you see Successfully Uploaded, locate the newly uploaded zip file, check the box and then click UnZip.
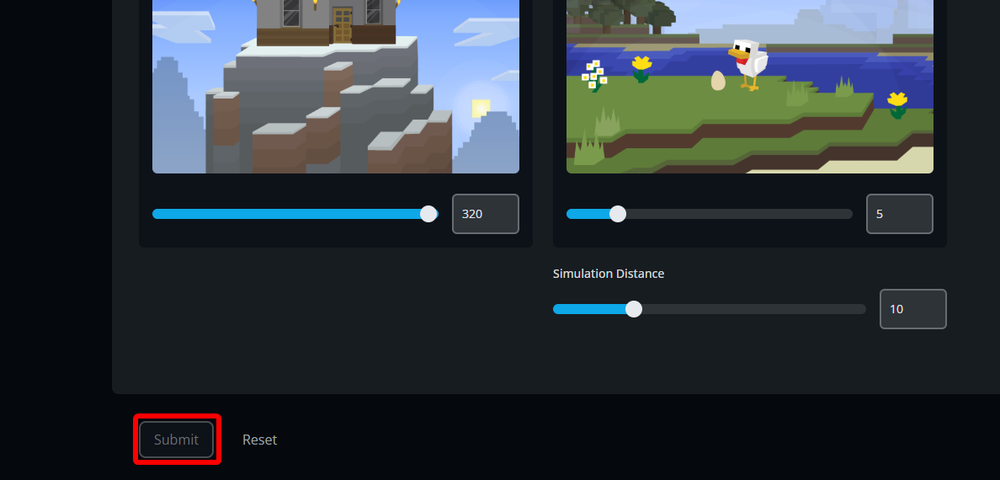
When the file is fully unzipped, navigate to Minecraft Server Settings on your sidebar then click on the Worlds tab.
Find the World Name section which will be the first option and enter the exact name of the folder that you unzipped previously. This should be the same name as the ZIP file without the .zip at the end.

When you've entered in the name, click on Submit at the bottom of the page.
Start your Server.
Large World Files
If the zipped files are very large, we recommend using an FTP client to manage the file upload. FTP stands for "File Transfer Protocol". It's a standardized way to connect to a remote computer and then manage the process of uploading large files. We have a basic guide for FTP use in our knowledgebase which you can find HERE. We highly recommend Filezilla for this, but the guide has links to many popular programs that can be used for FTP.
Additional Considerations and Troubleshooting
World Compatibility: Ensure that the version of Minecraft you used to create the world is compatible with the server's version.
World Name: If you want to change the name of the world on the server, you can rename the world folder.
Corrupted World: If the world doesn't load properly on the server, it might be corrupted. Try repairing the world using the Minecraft launcher.
Permission Issues: If you're unable to access or modify the
worldfolder, check your server's permissions settings.Plugin Conflicts: Conflicts between plugins can sometimes cause issues with uploaded worlds. Try disabling plugins one by one to identify the culprit.
Need Help?
If you have questions or run into any issues, our support team is here to help! Reach out using the support widget on our website or visit our support center for further assistance.