How to Setup txAdmin for FiveM
Getting your FiveM server up and running with txAdmin is a straightforward process when using the Nodecraft panel. txAdmin offers a feature-packed web interface that simplifies server setup, management, and monitoring. This guide will take you through the steps needed to setup txAdmin with your Nodecraft FiveM server.
🛑If you haven't enabled txAdmin on your server yet, follow the steps here before proceeding! It's important to understand that enabling txAdmin will override and disable Nodecraft's configuration options within the control panel.
Obtain Your License Key
Note: If you do not already have a Cfx.re license key, follow our guide here to generate one.
Navigate to the Cfx.re Login Page located here: https://portal.cfx.re/login.
Click the Sign In With Cfx.re button.
Click on the Servers tab at the top of the page.
Within the Server Registration Keys section, locate the key you'd like to use for your server.
Click the Copy button within the Actions to the right of the listing.
Authorize Access for txAdmin
Start your Nodecraft FiveM server.
Navigate to the Console tab on your Nodecraft control panel.
The console will display a txAdmin Web Panel link and a PIN if enabled correctly.
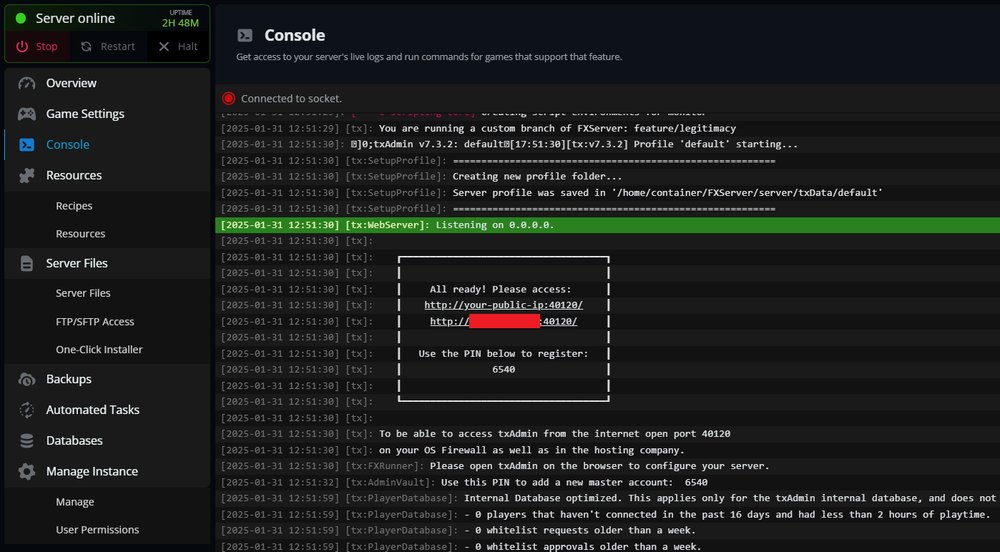
Open the provided link in your browser and enter the PIN to link the server.
Log in with your Cfx.re account and grant txAdmin the necessary permissions.

Initial txAdmin Setup
After successful authorization, you will be guided through the txAdmin setup wizard. Provide the following information:
Server Name: Enter the name you want displayed in the server list.
Deployment Type: Select the appropriate option:
Popular Recipes (recommended): Use a pre-configured template such as CFX Default FiveM, ESX Legacy, or QBCore.
Custom or Advanced Options: Choose this if you want to configure the server manually.

Select a Server Template
Choose the appropriate server template to deploy the core server resources based on your needs. Popular options include:
CFX Default FiveM: A basic configuration to get started.
ESX Legacy: A roleplay server template.
QBCore Framework: For an advanced roleplay experience.
Note: VORP Core is for RedM servers only!

Review and Run the Recipe
After selecting a template, txAdmin will present a recipe file containing the tasks and resources it will install.
Review the recipe to ensure it meets your requirements.
Click Next to proceed to the next steps in the recipe.

For Step 2 of this, you'll want to use the License Key that you obtained earlier during this setup.

Configure the server.cfg File
After running the recipe, you will be prompted to configure the server.cfg file. This file defines key server settings.
sv_hostname: The name displayed in the FiveM server list.
sv_licenseKey: Ensure your license key is correctly entered.
sv_maxclients: Set the maximum number of players.
Admin and role configurations: Add server administrators or permissions.
Here is an example configuration!  Once you're happy with your configuration settings, click Save & Run Server
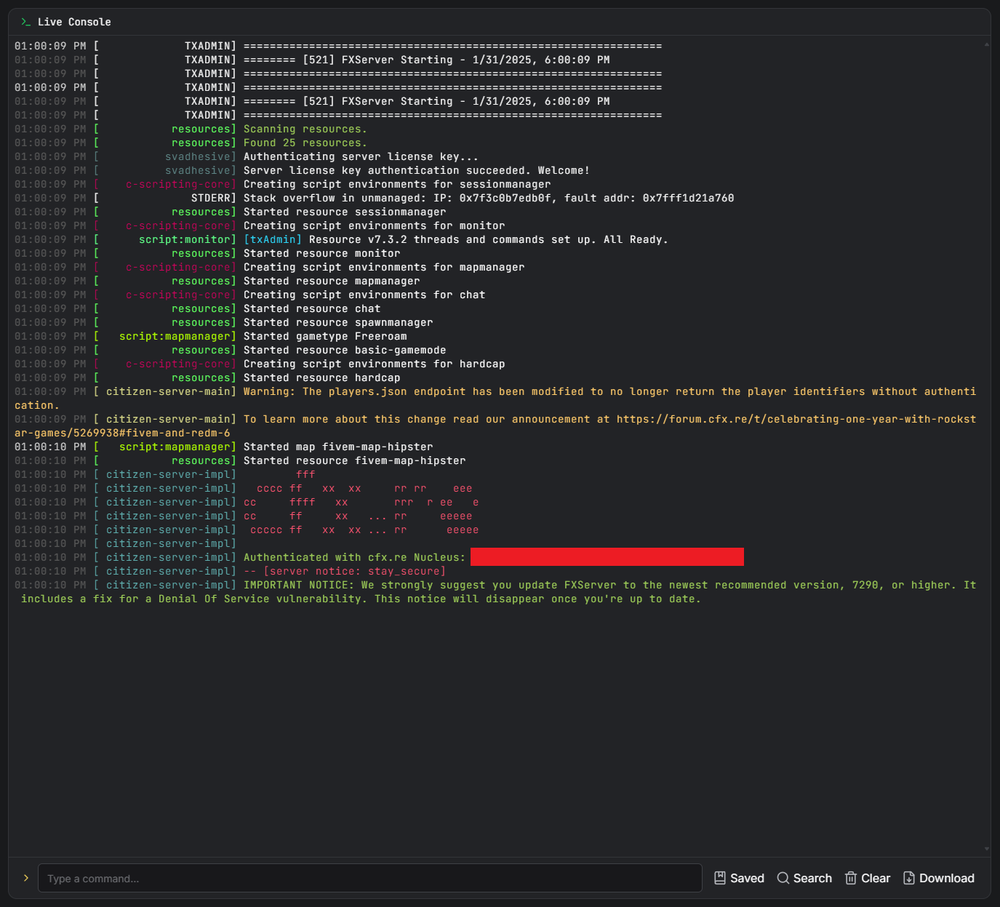
Monitor the Server Console
After saving the configuration, the server will start automatically. The Live Console will display the startup process and logs, allowing you to monitor resource loading and server status.
Look for messages confirming that the license key was authenticated, and resources were loaded successfully.
The final output should indicate the server is online and ready to accept connections.
Managing Your Server
Once the server is running, you can return to the txAdmin Dashboard to manage server resources, monitor player activity, and adjust configurations and permissions as needed.
Conclusion
Your FiveM server is now online, configured, and ready to go. From the txAdmin Dashboard, you can manage player activity, add or remove resources, and adjust server settings as needed. Make sure to keep your server updated to ensure optimal performance.
For more customization, check out FiveM documentation or the official txAdmin guide.
Need Help?
If you have questions or run into any issues, our support team is here to help! Reach out using the support widget on our website or visit our support center for further assistance.