How to Change Your Skin in Minecraft | Bedrock Edition
Customizing your character with skins and capes in Minecraft Bedrock Edition is a fun way to express your style in-game. Whether you’re using classic skins or custom characters, this guide will show you how to change skins, use the character creator, and equip a cape in Minecraft Bedrock!
If you're looking for instructions for Minecraft: Java Edition, you can find that here: How to Change Your Minecraft Skin | Java Edition
Changing Your Skin in Minecraft Bedrock Edition
Minecraft Bedrock Edition gives you two primary options for skins: Classic Skins and Custom Characters. Here's how you can switch between these and upload your own custom skin.
How to Change Classic Skins
Launch Minecraft Bedrock Edition on your device and navigate to the title screen.
Click on the Dressing Room option located underneath your character model. This is where you can edit and customize your Minecraft character.

To create a new character, click the + button or the Create Character button in an empty character slot.

Select the Classic Skin type.

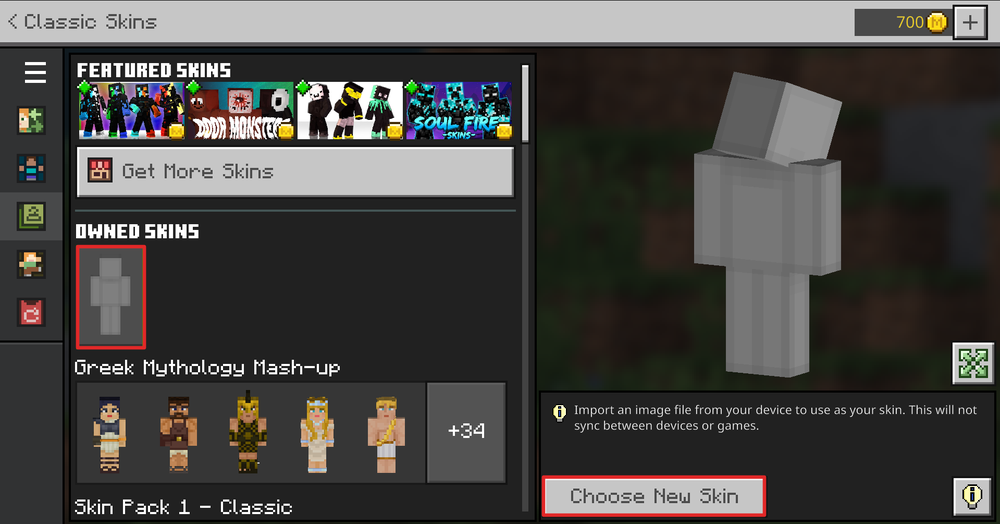
If you have a skin that you would like to upload, click on the blank character icon under Owned Skins, then select Choose New Skin to upload your custom skin.
Choose the correct model for your skin: Alex or Steve.
The Alex skin model (on the left), and the Steve skin model (on the right), have different dimensions. Keep that in mind when designing custom skins or using a Minecraft skin editor!
Using the Character Creator
The Character Creator allows you to design your own custom character from scratch! Follow the steps below to get started:
Launch Minecraft Bedrock Edition on your device and navigate to the title screen.
Click on the Dressing Room option located underneath your character model.
To create a new character, click the + button or the Create Character button in an empty character slot.
Select the Create Character option from the type menu.

Customize your character by using the Body and Style dropdown menus. From here, you can select various options like clothing, hairstyles, and more. Note: Be sure to click equip on each feature you select for it to save to your Minecraft character!

Once you're satisfied with your character, click the back arrow to exit the Character Creator and save your character.

Equipping a Cape
Launch Minecraft Bedrock Edition on your device and navigate to the title screen.
Click on the Dressing Room option located underneath your character model.

Use the arrows to select the character you want to equip the cape to.

Click the Cape button to open the cape selection menu.

Select a cape from your owned collection and click Equip to apply it to your Minecraft character.
Now, get out there and show off your new look on your Minecraft server!
For even more tips on enhancing your Minecraft experience, be sure to explore our other helpful guides here: Knowledge Base.
Need Help?
If you have questions or run into any issues, our support team is here to help! Reach out using the support widget on our website or visit our support center for further assistance.