What Are Instances and How To Use Them

What are Instances?
You can think of instances as a sort of a "game save" for an entire set of server files. Nodecraft's control panel allows for an entire set of files that make up a particular game to be stored away, and then later restored. The "Instance" acts like a reserved parking spot. When the server is stored (called an "Archive"), the Instance is where it will all go, packed away neatly. This isn't just a save of the game, but a snapshot of every single thing that was on the server.
When you restore a server (called a "Deploy"), every file that was on the server is put back as it was, with no loss of progress. The control panel even takes care of re-setting all the stuff on the Nodecraft backend as well.
Instances hold more than just the server files too. They're also linked to any backups that were made from that instance. If you destroy an Instance, everything connected to that instance is destroyed as well, in order to free up space.
Creating a New Instance
You can make a new instance by going to the "Dashboard" for your Nodecraft account. The dashboard is reached by clicking on the bright green button in the top right corner of almost all pages of the Nodecraft website.
Once on your dashboard, you will see a list of all your currently deployed servers, your archived servers, and links to things like your account profile and billing. If you just set up your service with our company, these sections of the dashboard might be completely blank (welcome to Nodecraft by the way!).
To create an instance, click on the dark grey box labelled "Instance Slot". This will start a process where you select the game, the location, name the instance, and other things.

Select Game Page
You will see a series of thumbnail images for games, and can scroll up and down the list to see all the games we offer in our automatic installer. Click on a game to select it and proceed.

Instance Page
There's a long page, with a lot happening here! This is where you can set:
Instance name
Hostname
Datacenter Location
Customize the server
Since there's so much going on here, well cover each of those separately.
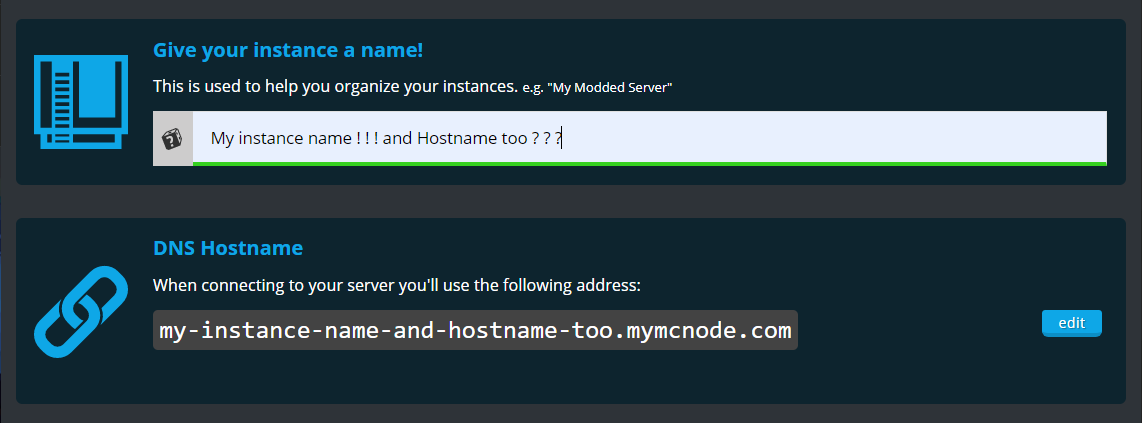
Instance Name
You enter a label for your instance, which you can use to tell them apart. You can name instances as a reminder of how it's setup or customized. "My CSGO training server", "Minecraft Skyfactory 4 Server", "Rust solo/duo server", etc. 
The instance name being set here is NOT visible to players joining the server, though it will usually be used to create the Hostname automatically. The name that players see in server listings inside a game is usually set within the config files of a game itself. This is just a note describing the server that appears on the Nodecraft control panel, visible to only yourself and the Nodecraft staff.
Hostname
The text you enter as the instance name is automatically used to create the hostname, but with some changes. The hostname may or may not be visible to players in server listings within a game. Many games have specific config file settings that actually control how a servers shows up in the listings.
The hostname has some rules:
It can't have certain characters
It can't have any spaces
Any characters not allowed are removed, and spaces are replaced with dashes. The control panel automatically does this for you. See the screenshot below for an example of how the Instance name is changed when the hostname is created from it.
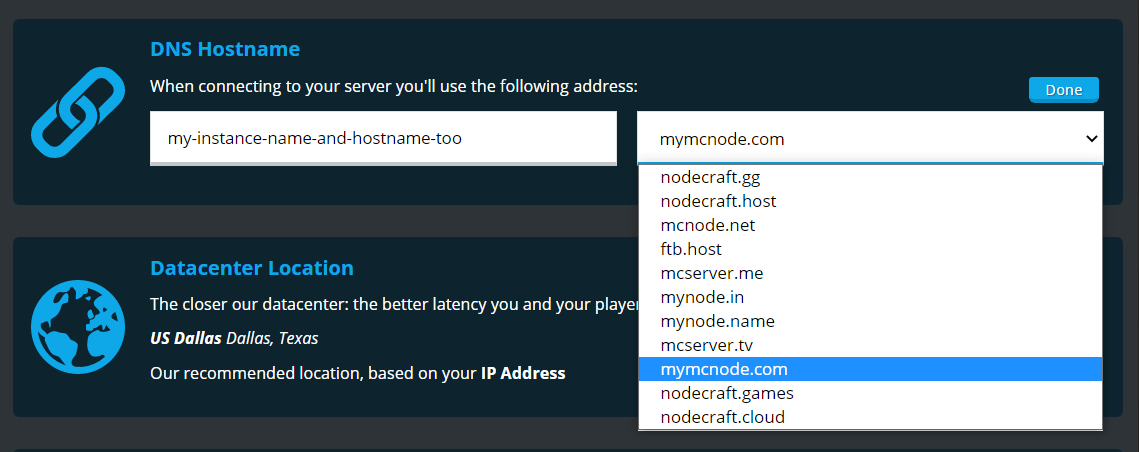
Editing the Hostname
You can change the hostname text, by clicking on the blue "edit" button in the hostname section. This allows you to not only change the portion that was created from the instance name, but change the suffix/domain of the hostname from a list of choices.
Hostnames have to be unique!
If someone has already used that combination of hostname (and domain), then it cannot be selected. This can include other customers or even your other instances (even your archived instances). If you want to re-use an exact hostname for a new instance, you would have to edit a saved instance that's already using it, and change it to something else there first. There's a section that shows you how to edit existing instances at the end of this guide.
If you are still having trouble using a certain hostname, try changing the domain name to one of the other choices. my-cool-server.mcserver.tv is considered a totally different hostname from my-cool-server.nodecraft.gg
Datacenter Location
This allows you to choose where your server will be setup, which can effect things like connection speed and latency depending on where your players are located.

Our systems will automatically detect and recommend the nearest Datacenter location to you based on your network and auto-select that. There's a button that also triggers an even more accurate location detection using your system's location services, called "Detect Location". This location is never stored and only used to query a location nearest to you.
If you want to change that automatic choice, you can click the blue "Select Location" button, which will open a map of all datacenters.
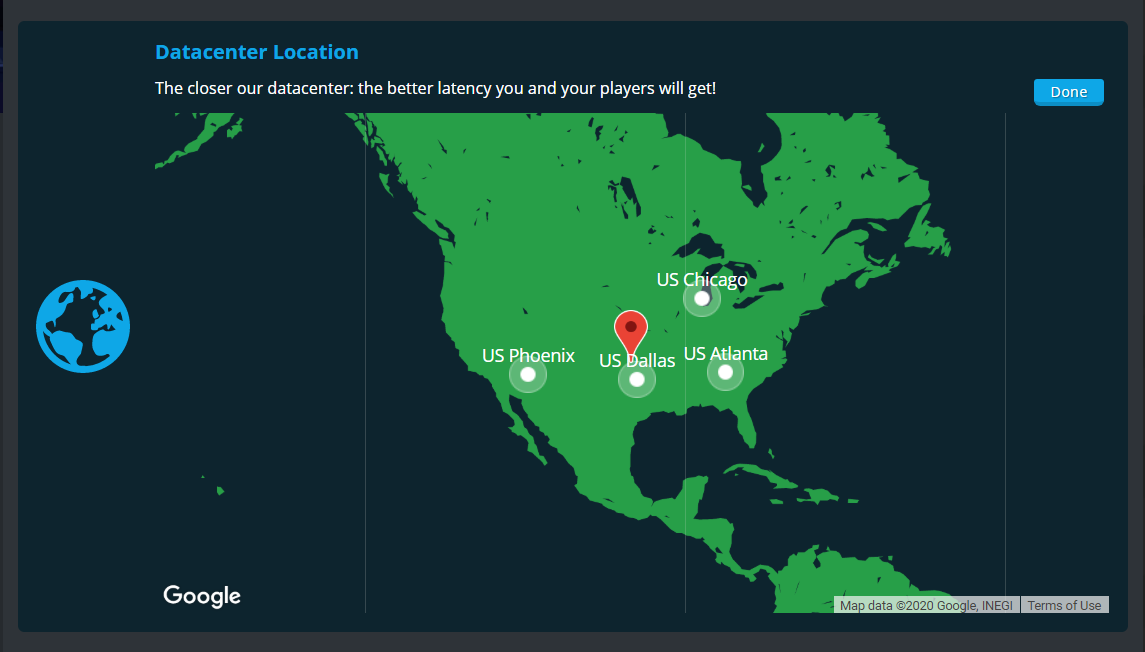
Click on Datacenter locations shown to change where the server will be created. You can move the map to view other locations by clicking on the map and dragging it around. Nodecraft has servers located around the world!
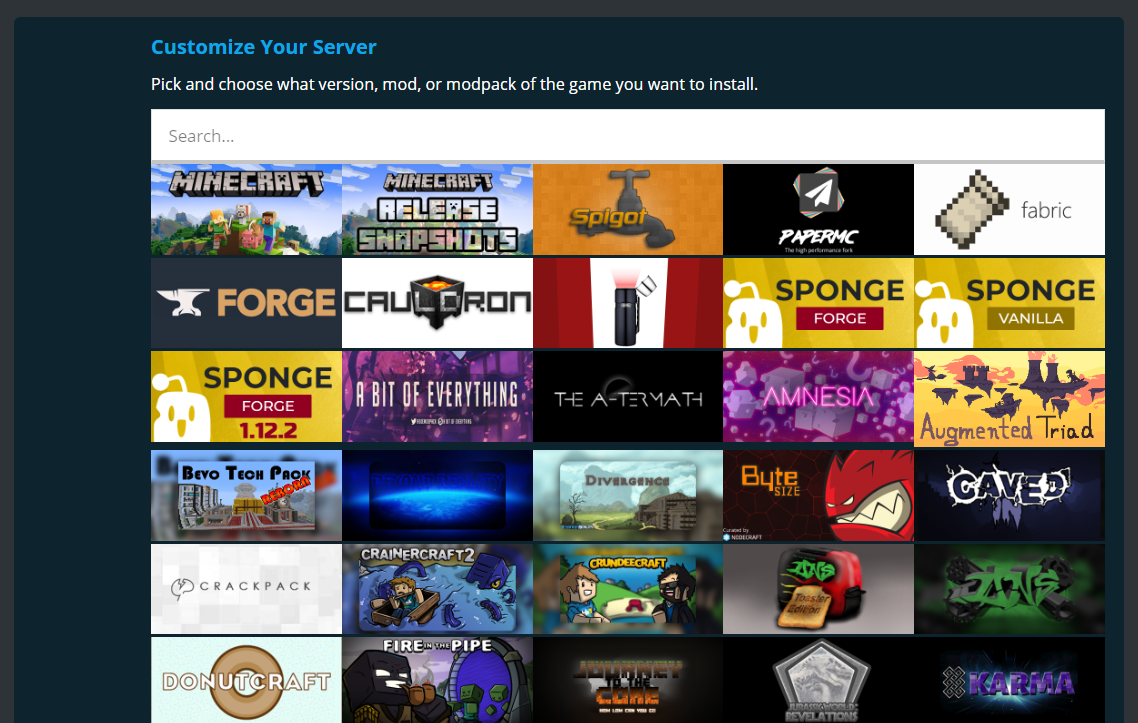
Customize
The customization choices vary widely depending on the game:
Modpacks for games like Minecraft
Special versions of a game (often used by people developing mods and similar things)
Experimental versions of a game (let's become amateur bug testers!)
Below is a partial selection of Minecraft variants and modpacks, for example:
On other games, if you aren't sure which version of a game to install, the one labelled "Official" is usually the normal version of the game.
Performance Warning and Create Button
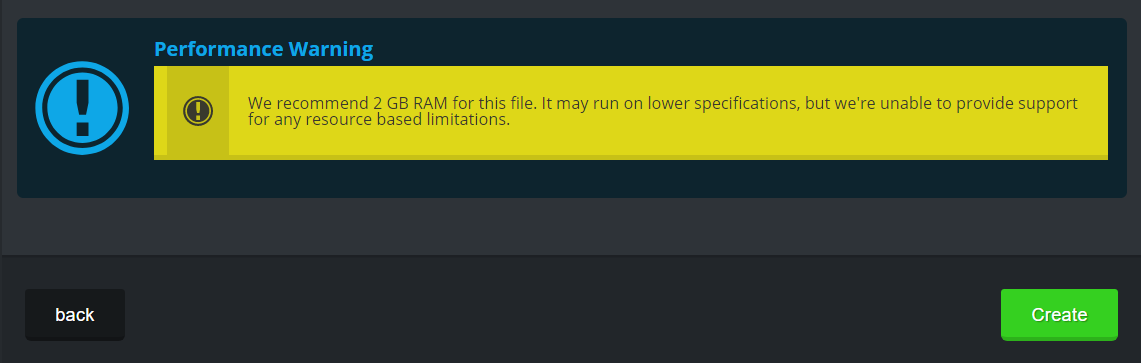
At the very bottom of this page, you will see a performance warning based on the version of the game you chose to install (the options in customization can have a big impact on this).
You will see this warning even if you have enough or even more RAM then it the warning states, as you may have multiple bots with different resources. If you have 8GB of RAM available with your bot, you will still see warnings about needing 2 GB during the instance creation process.
Click the bright green "Create" button to finalize the choices you made.
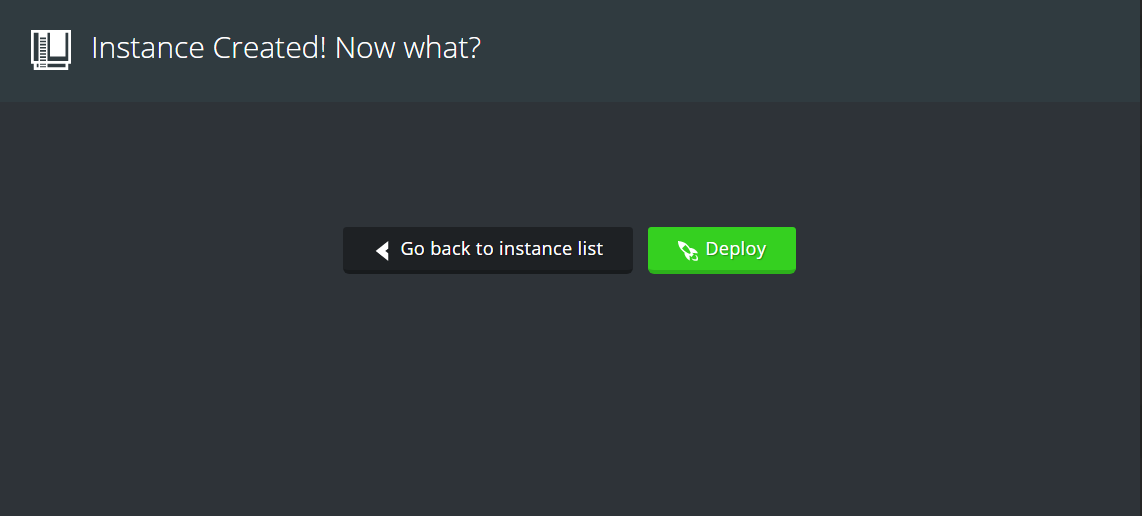
Then click on the bright green "Deploy" to start the creation of the server!
If you do not have any available bots on your account, you will not receive an option to deploy the bot yet. Don't worry, it's still saved on your account though and you can deploy once you purchase a bot!
New Instance Created!
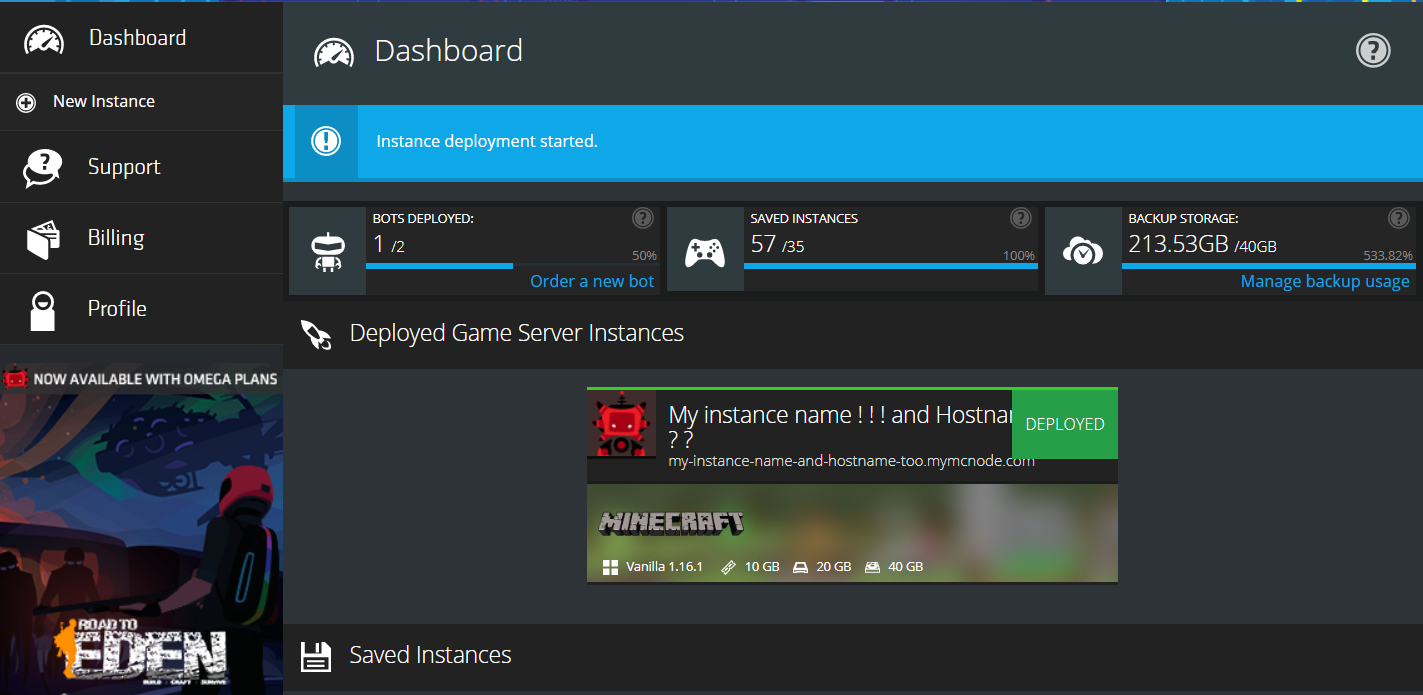
The system will create a whole new instance, and install the game files there! It will show in the "Deployed Game Server Instances" section of the Dashboard when it's finished.
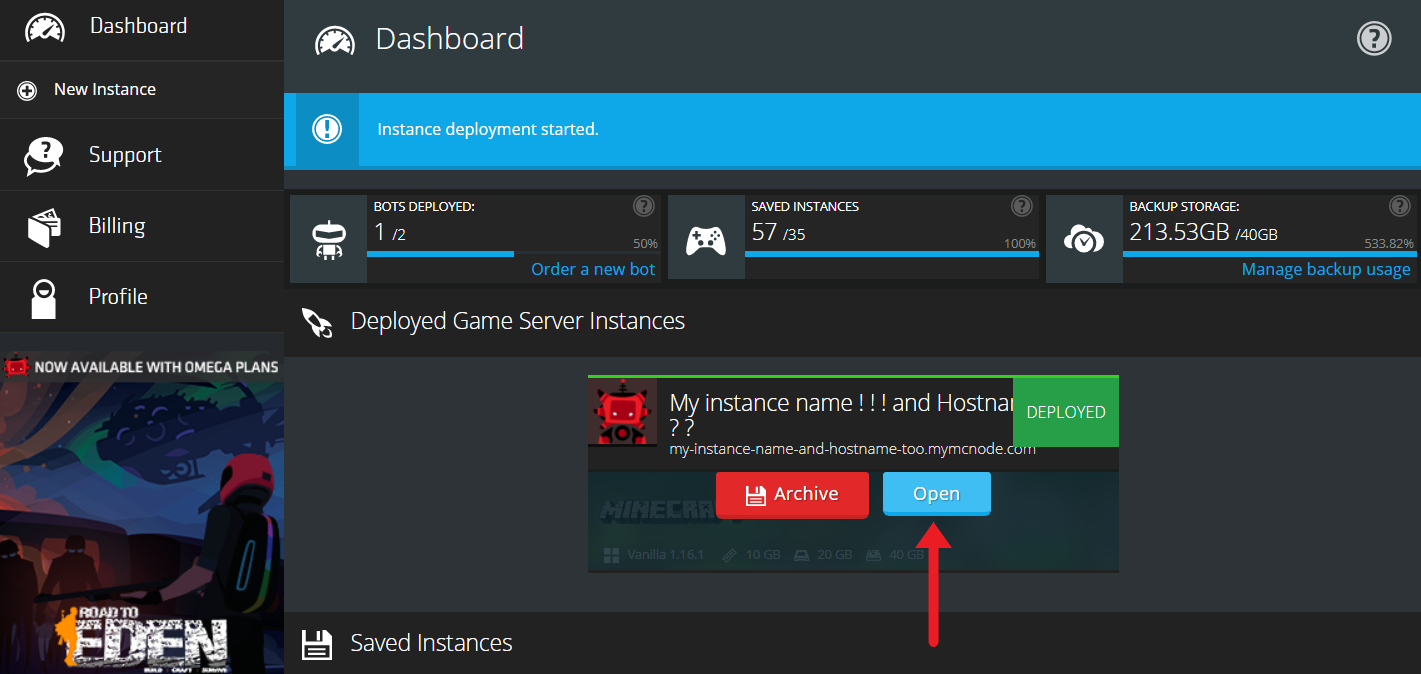
If you want to go to the server control panel for this instance, move your mouse over the server in the "Deployed Game Server Instances" section. Two buttons will appear, and click on the blue "Open" button to be taken to the control panel for the server.
Archiving an Instance
If you move your mouse over a deployed instance, two buttons appear, "Archive" and "Open". Click the red "archive" button to begin the process of storing the server away.
This happens in two steps:
Creation of a massive .zip file containing everything on the server.
Moving that .zip file off the server to cloud storage on the internet.
There's a percentage progress meter that appears, starting at 0%. The meter is only the progress of moving the files (the 2nd step), and won't actually begin to change until the .zip file is made and being moved to cloud storage.
When it's in the 1st step (making the .zip file), it will stay at 0% until it's finished zipping the files!
For some very large games with lots of files (like CS:GO or Garry's Mod), this can take a considerable amount of time to complete the 1st step.

Deploying an Instance
To deploy an instance, move your mouse over it in the "Saved Instances" section of the dashboard, and click on the "Deploy" button that appears.

In this screenshot, there are no servers currently deployed, so the entire "Deployed Game Server Instance" section has been hidden away. That section will re-appear when a server is actually deployed.
The Nodecraft system will find an open spot on a node at the chosen datacenter, and begin setting up the files!
Available Bots
You can only deploy an instance if there are any available bots (service plans) on your account. These are shown in the section of the screenshot above in the red rectangle.
In "Bots Deployed" section:
The number on the left is the total amount of bots (plans) you have
The number on the left is the empty ones available to deploy an instance
So if you see "1/1" there, it means all your bots are in use, and you will first need to archive the currently deployed instance.
IP Address Often Changes on Deploy
It is common for a completely new IP address to be assigned as part of a deployment.
When you deploy an instance, the Nodecraft system automatically scan the nodes (physical devices) at the datacenter, and find an open slot for you on one of those nodes. This might not be the same location you were at before, as a server belonging to another customer may have been automatically deployed into that slot.
The IP addresses are tied to the actual physical devices, like real world addresses on an actual street. So if you were moved to a new node (street), then you get a new IP address (street address) there.
Sometimes if you archive and then deploy quickly, you'll be put right back into the slot you just came from. This is sort of done on purpose, as the files remain there for a bit, and it's faster to simply move you back into that slot. But you can't depend on this happening regularly. As soon as you leave a spot (by archiving), someone else can pull right into that space - just like cars at a busy parking lot. And no, you can't bump other cars out of the way, that's only in movies!
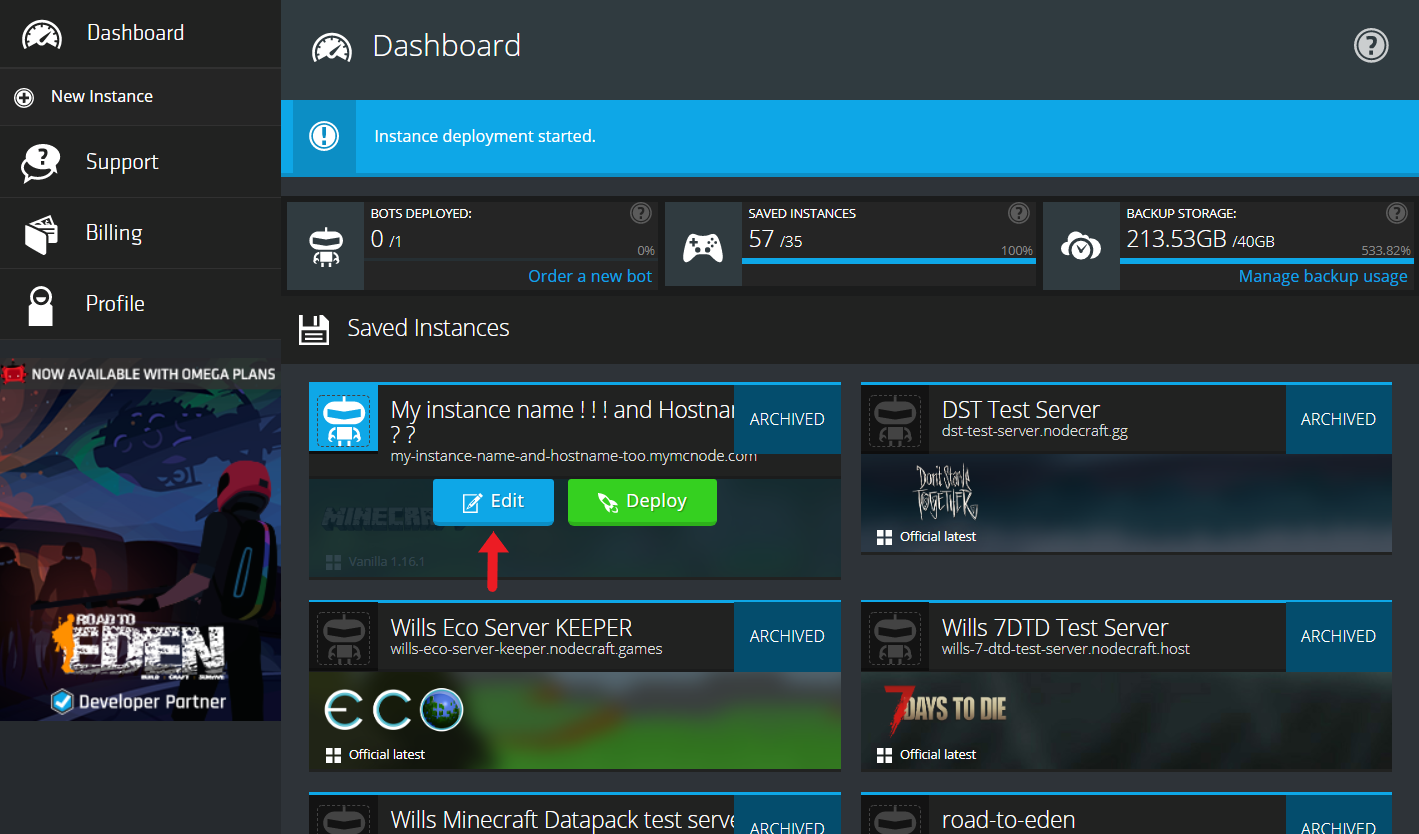
Editing an Instance
When an instance is archived, you can edit settings for the instance, such as instance, hostname, and datacenter location. Move your mouse over the saved instance, and click on the blue "Edit" button that appears on saved instances.
This will open a page very similar to the creation of a new instance. Some options can only be set at instance creation, so you will not see the "Customize" section for example.
Instance name (The label on the dashboard. Once again, this is not usually visible to players joining the server)
Hostname
Datacenter Location
It will also list all the backups connected to this instance.
There should always be at least one backup on each saved instance. This is the backup the system will use to restore the instance when you deploy it!

If you make any changes, click the green "Save" button in the lower right corner.
Deleting an Instance
You can delete an instance by going to the "Edit" screen of an archived instance. In the lower right corner is a red "Destroy" button.
Click that "Destroy" button to permanently delete the instance, and everything connected to it (including backups!). When we say permanent, we mean absolutelypermanent . It's gone, it's dust, nada, zilch. That's that's that's all folks. Godzilla stomped on it, breathed radiation on it, and then whomped it with his tail for good measure. Then he scuffed dust on it as he waddled away.
Nodecraft support cannot restore an instance that is manually destroyed. It why we call the button "Destroy".
Alternatives to Destroying
In many cases, you might want to consider simply leaving an instance as a saved instance, just in case you might need some files from it later on.
If you want to re-use the same exact instance name, please remember the instance name is only visible to yourself and the Nodecraft staff. When making new instances, you can always just make new labels, such as "My server 1", "My server 2", etc.
If you want to keep the same Hostname (which is visible to players in some server listings), consider editing the saved instance you were going to destroy and changing its hostname first. This will make that original hostname available to be re-used again. You can then use that same hostname on a new replacement server.
Need Help?
If you have questions or run into any issues, our support team is here to help! Reach out using the support widget on our website or visit our support center for further assistance.