How to Reset Your Server for The Isle
Resetting your game server can give you a fresh start by clearing out old files, settings, and generating a new world for you to explore all over again! These steps will vary depending on the Isle Server Host that you've chosen. Follow this step-by-step guide to reset your The Isle server through your Nodecraft control panel.
Creating a Backup
While creating a backup is optional, it may be something you’ll give yourself a pat on the back for doing if you end up regretting deleting your server world or the game server entirely.
Navigate to your The Isle control panel.
On the left side, choose Backups.
Click Create Backup and wait for the process to finish.
Note: The time a backup takes will depend on your server size! Feel free to grab a snack while you wait if your server is large.
Resetting Your The Isle Server
Navigate to your The Isle control panel.
Click on Server Files on the left side.
Go to the following directory: /TheIsle/Saved
Delete the following folders:
- PlayerData
- SaveGames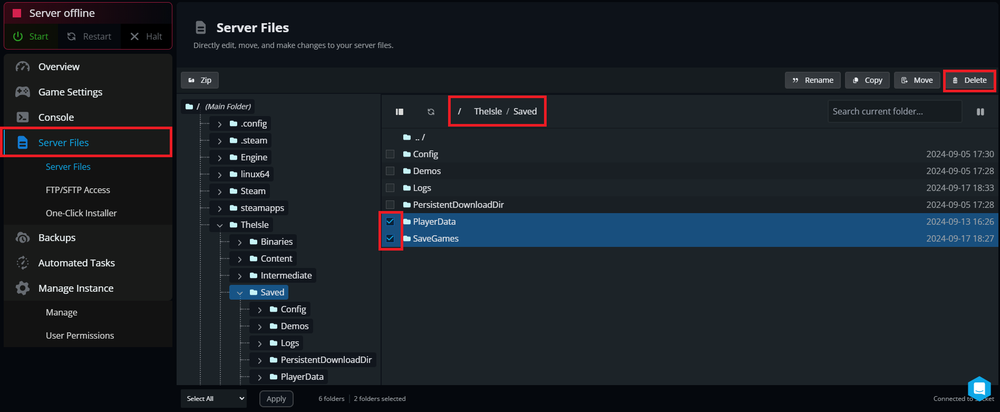 This will remove ALL of your current save progress and player data.
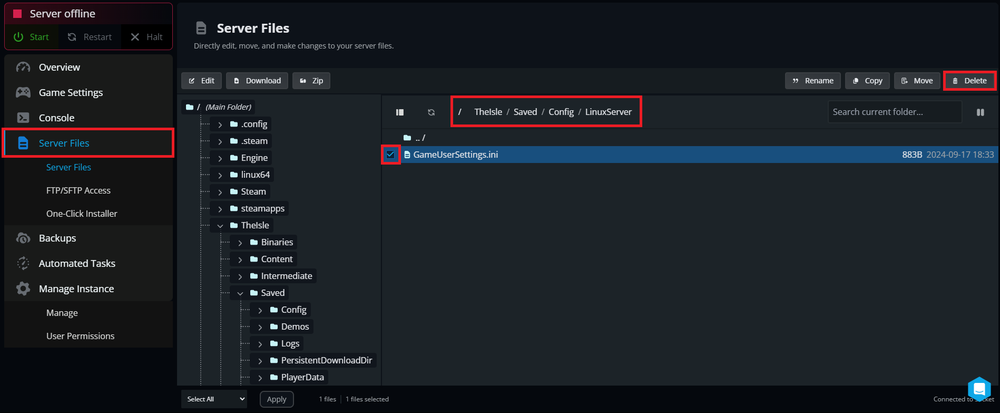
Delete Server Configuration (Optional)
Within the Server Files area, go to the following directory: /TheIsle/Saved/Config/LinuxServer
Delete the configuration files that you want to reset. A default config file will regenerate.
Complete a Full Reset
For a complete game server reset, you can reinstall your The Isle server from the One-Click Installer.
Click on One-Click Installer on the left side of the Nodecraft control panel for your The Isle server.
Select The Isle from the list
Choose Fresh Install.
Click Install.
Note: This will delete all files and configurations. If you want to preserve any files (such as mods or custom scripts), back them up or download them before proceeding.
Once the desired files are deleted or you've completed a full reset, click Start to relaunch the server. Your The Isle server should now be fully reset and ready for adventure!
Need Help?
If you have questions our support team is here to help! Reach out using the support widget on our website or visit our support center for further assistance.