How to Change Your FiveM Server Name and Description
Customizing your FiveM server’s name and description is a great way to attract players and communicate key details about your server. A unique, descriptive name helps your server stand out, while a detailed description highlights its features, rules, and overall atmosphere, making it easier for players to find and connect with the type of community they’re looking for. Check out the steps below for a walkthrough of how to edit these particular settings on your Nodecraft FiveM game server!
Note: Be sure that your FiveM server is fully stopped before making any configuration changes or setting updates!
Using Your Control Panel
Log in to your Nodecraft Control Panel.
Navigate to the Game Settings tab.
Click on the Server Listing tab.
Locate the Server Name field and the Server Description field.
Enter in your desired server name and description within these fields.
Click Submit.
Start your server!

Using the Server Files
Log in to your Nodecraft Control Panel.
Navigate to the Server Files tab.
Locate and select the
nodecraft_config.cfgfile and then click Edit.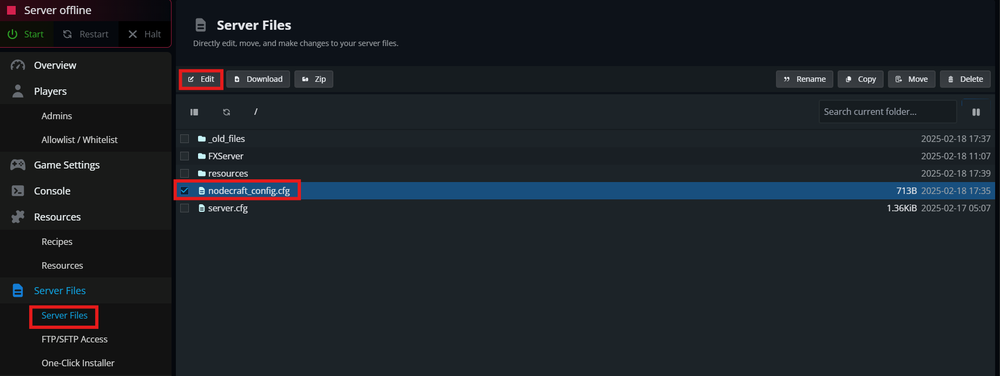
To update your server's name, edit the line:
sv_projectNameTo update your server's description, edit the line:
sv_projectDesc
Save your changes.
Using txAdmin
Note: txAdmin must be enabled and set up on your server before continuing with these options. If you haven't completed these steps yet, check out our guide here.
Log in to your Nodecraft Control Panel.
On the Overview tab, locate the txAdmin info box.
Click on the available IP address.

Log in to txAdmin.
On the left-side toolbar, click CFG Editor under the Change-Me section.
To change your server's name, edit
sv_projectName.To edit your server's description, modify
sv_projectDesc.
Click Save File to apply your changes.
Start your server.
Conclusion
Your server’s name and description are the first things players see, so making them count is key! A well-crafted name grabs attention, and a clear, engaging description helps players decide if your server is the right fit for them. Now that you’ve updated these settings, your server is ready to make a strong first impression!
Need Help?
If you have questions or run into any issues, our support team is here to help! Reach out using the support widget on our website or visit our support center for further assistance.