How to Become an Admin on Your Arma Reforger Server
Running an Arma Reforger server can be even more efficient when you're set as an admin. Admins have access to critical server commands and tools that help keep gameplay smooth and enjoyable. Whether you prefer a user-friendly control panel or want to dive into the config files manually, this guide will walk you through everything step-by-step.
Adding an Admin Password
Using the Nodecraft Control Panel
Note: Be sure that your Arma Reforger server is fully stopped before making any configuration changes or setting updates!
Navigate to your Arma Reforger servers’ dashboard.
Locate and click the Game Settings
Click the Admin tab.
Find the field labeled Admin Password and enter your desired admin password (do not include any spaces).
Click Submit to apply your changes.
Start your server
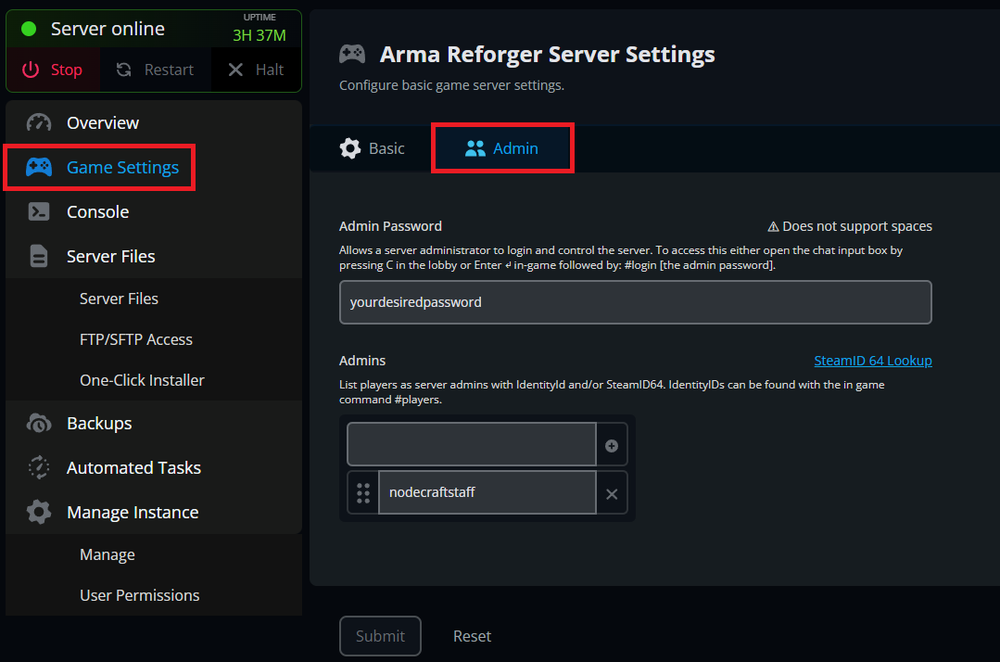
You can also add individual players ahead of time to be admins.
In the same Admin tab, you'll see an option to add admin players.
You can use either their IdentityID, or Steam64ID (you can find it using Steam ID Finder.
Add the IDs into the admin list fields provided.
Again, don’t forget to Submit your change to Save.
Editing the Config File Manually
If you prefer a more direct approach or don't have access to the Nodecraft panel, you can become an admin by editing the config file directly.
Access your server's files. At Nodecraft, this will be the Server Files tab from your control panel.
Locate and open the file named:
config.json.Find the line in
config.jsonthat looks like this:
"passwordAdmin": ""4. Replace it with your desired password, making sure it contains no spaces, for example:
"passwordAdmin": "mysecureadminpass"5. Save your changes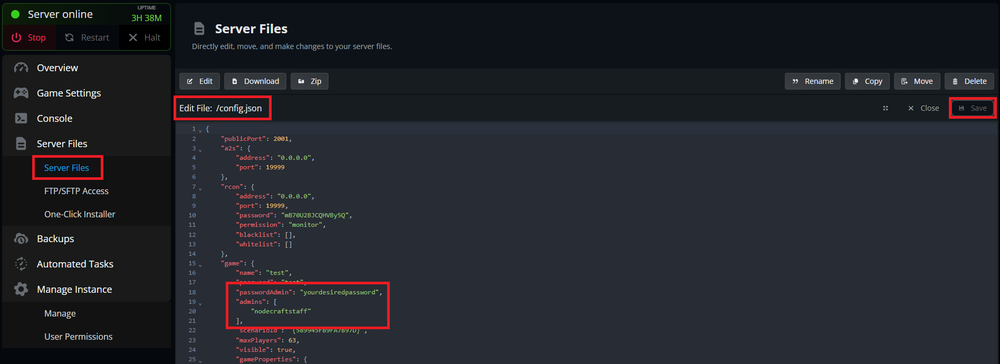
You can also add individual players ahead of time to be admins.
Still inside
config.json, locate or add the"admins"field.You can add players like this:
"admins": [
"identityid",
"12345678901234567"
]
This list can include Identity IDs or Steam64IDs.
3. Save your changes.
Becoming an Admin
After saving changes, Restart Your Server to apply all updates.
Launch Arma Reforger and join your server.
Open the chatbox in-game, type and enter the following command (replace with your password):
#login yourAdminPasswordFor example, if your password is
hunter2, type:
#login hunter24. Press Esc to open the in-game menu.
5. You should now see the option to Become Game Master. Click it to start using admin commands and tools.
Conclusion
Becoming an admin on your Arma Reforger server gives you the tools to manage, moderate, and enhance gameplay. Whether you use Nodecraft's user-friendly Game Settings tab, or prefer editing config files directly, both methods are quick and effective.
Need Help?
If you have questions or run into any issues, our support team is here to help! Reach out using the support widget on our website or visit our support center for further assistance.