How to Create a Flat World on a Hytale Server
In this guide we are going to cover generating a flat world on your Hytale server Including adding more layers since a normal flat world will only be a single layer. A flat world is great to be able to spread out across an endless space for you to create any builds you imagine no matter how large or small.
Generating A Flat World
Open your Dashboard
Locate your Hytale server and click on the Panel button.
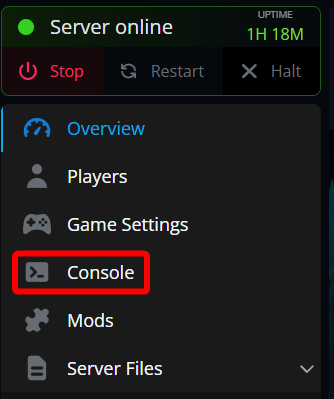
Navigate to your Console tab.
Once on your console, type /world add (any name you want) --gen Flat then hit enter.

The process of generating the world could take a minute but is finished when you see Created world (world name).

Adding More Layers
Once the world is generated, go back to your Panel, stop your server and navigate to your File Manager.

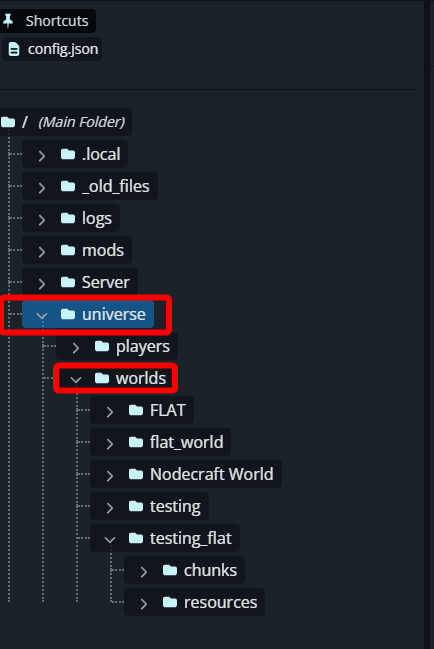
Once on the File Manager, navigate to the universe folder, then worlds then the folder that matches the name of the world you just generated.
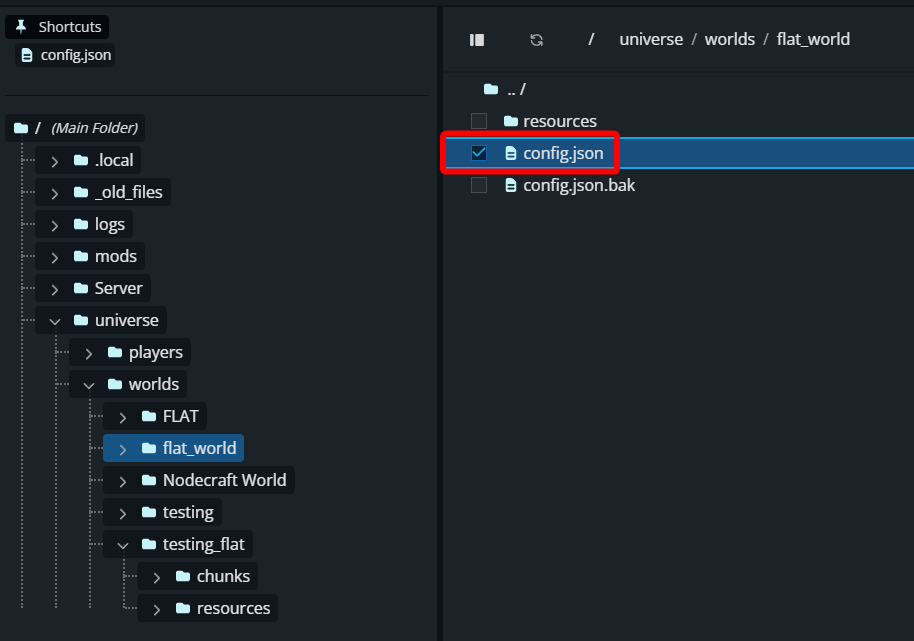
Once in the worlds folder, locate the config.json and open the file by double clicking on it.
Once open, locate the section of the file that starts with "Layers" and looks like the following selection.
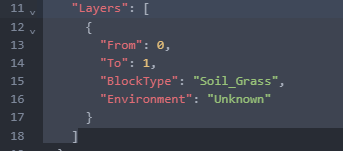
Replace the highlighted section with the following
"Layers": [
     {
       "From": 0,
       "To": 75,
       "BlockType": "Rock_Stone",
       "Environment": "Env_Zone1_Plains"
     },
     {
       "From": 75,
       "To": 79,
       "BlockType": "Soil_Dirt",
       "Environment": "Env_Zone1_Plains"
     },
     {
       "From": 79,
       "To": 80,
       "BlockType": "Soil_Grass",
       "Environment": "Env_Zone1_Plains"
     },
     {
       "From": 80,
       "To": 320,
       "BlockType": "Empty",
       "Environment": "Env_Zone1_Plains"
     }
   ]
6. Once done, it should look like this. 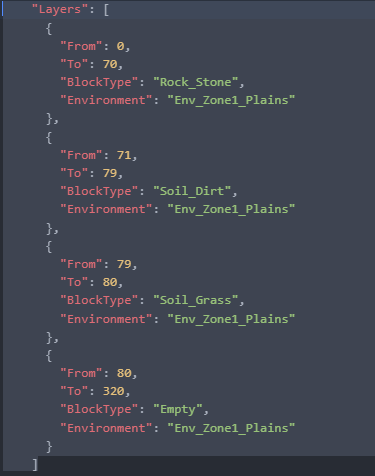
7. Save the file with the green Save Changes button in the upper right corner and start your server. 
8. Once your server is started, return to your console and run the following command to regenerate the world with the additional layers. This will wipe anything built on the world.: /worldgen reload --world (name of the world you original generated) --clear ![]()
Conclusion
You now have a fully custom flat world on your Hytale server, complete with multiple layers tailored to how you want to build and play. Flat worlds are perfect for large-scale projects, creative testing, and controlled environments where terrain never gets in the way. Now that you know how to generate the world and customize its layers, you can tweak materials, depths, and layouts to match whatever you are planning next!
Need Help?
If you have questions or run into any issues, our support team is here to help! Reach out using the support widget on our website or visit our support center for further assistance.