How to Purchase a Hytale Server
Ready to spin up your very own Hytale server? With Nodecraft’s free trial, getting started only takes a few minutes and a couple of clicks. From picking a plan to launching your server, this guide walks you through the full setup process so you can focus less on setup screens and more on actually playing.
Note: Claim your free 24-hour or 7-day trial today!
Get started by navigating over to Nodecraft's website for Hytale servers or choose Hytale from the available games!

Choose the server plan you'd like to use. Hytale does recommend a minimum of 4GB of RAM.

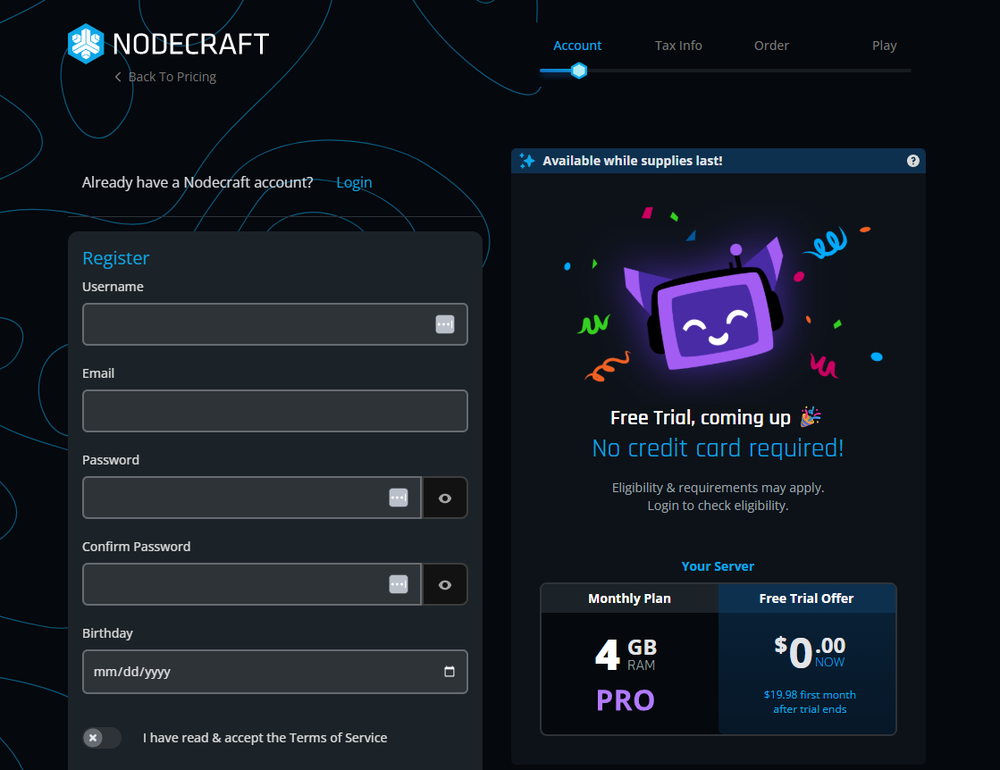
You now need to register for your account. Enter in your desired Username, email, password, and birthday! Be sure to read and agree to the Terms of Service as well.
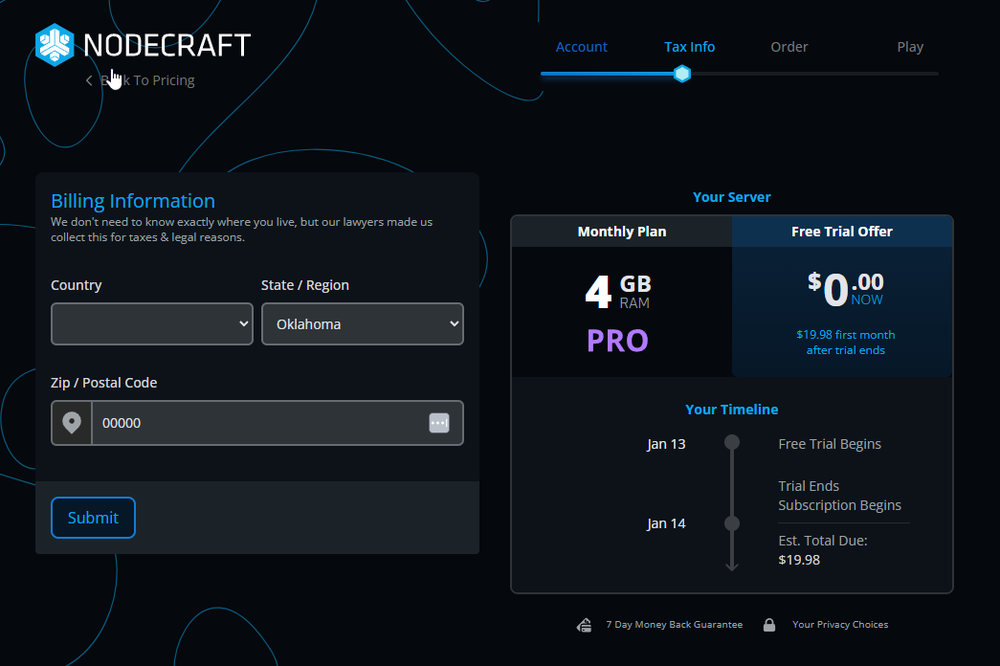
Now you'll want to enter in a few basic billing details such as the country and state you live as well as your zip/postal code.
Next, you will need to verify your phone number for a 24-hour trial, or you can enter in billing details to unlock a 7-day trial. You will not be charged until the trial ends and your full plan begins.
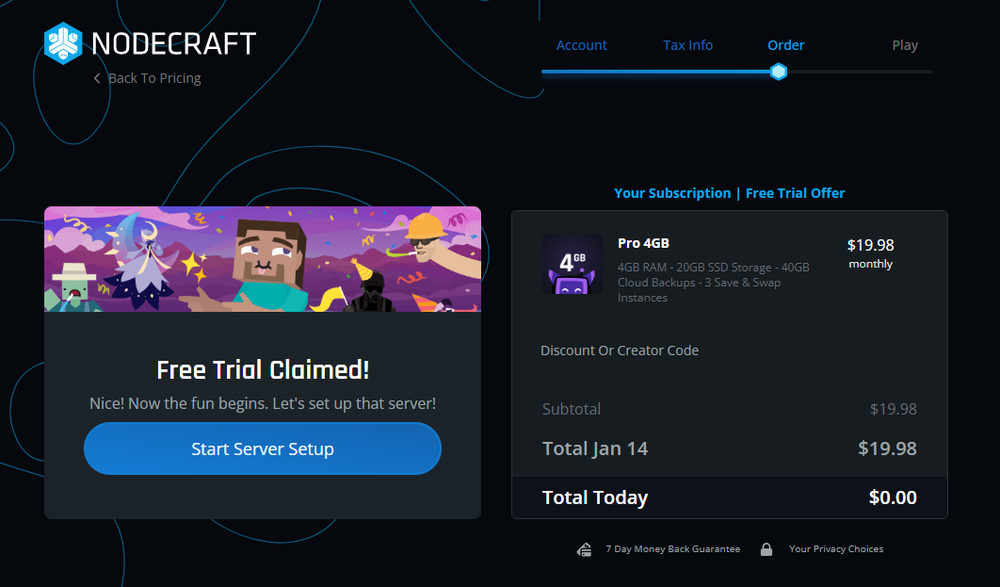
Once your free trial has been claimed, or you've completed purchase of a server, click Start Server Setup.
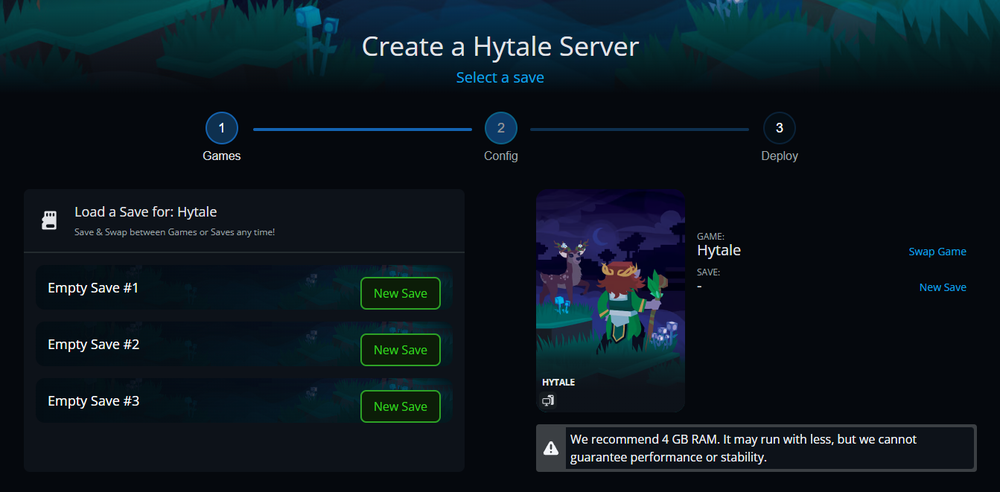
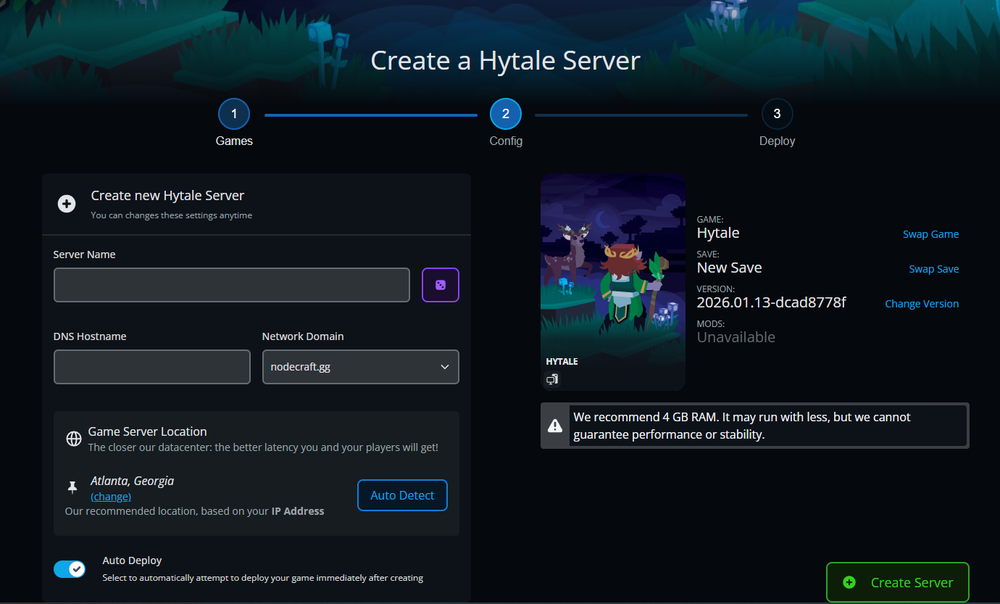
It's time to set up your server! From the available list of games, choose Hytale. This is the game selection for what your server will be created with.
Choose an existing save to load for your server or click the New Save button if this is your first Hytale Server.
Enter a Server Name and what you would like your DNS Hostname to be. You can also choose a specific location for your server. We do recommend ensuring the Auto Deploy option is toggled on.
Click Create Server.
Your server will now create and deploy. From here, you'll want to load into your Dashboard and click the Panel button available on your Hytale Server banner.
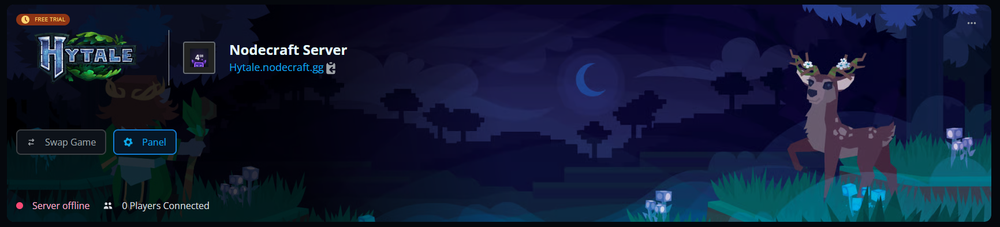
Once your server finishes deploying, you’re officially in business. Head back to your Dashboard, click the Panel button on your Hytale server, and you’re ready to start exploring. From here, it’s all about building, testing ideas, and seeing what kind of chaos or creativity unfolds first. Load in, get started, and we'll be here if you need help. 🙂
Need Help?
If you have questions or run into any issues, our support team is here to help! Reach out using the support widget on our website or visit our support center for further assistance.