Enabling and managing the server allowlist (whitelist)
Setting up a whitelist on your Minecraft server will prevent unwanted players from joining. A great use-case for an allowlist is to only permit friends/family to join the server.
Note: Nodecraft's Pro Panel generally issues commands to your server in real-time, such as enabling the whitelist. However, some changes may require a restart to take effect.
Enabling and managing the whitelist
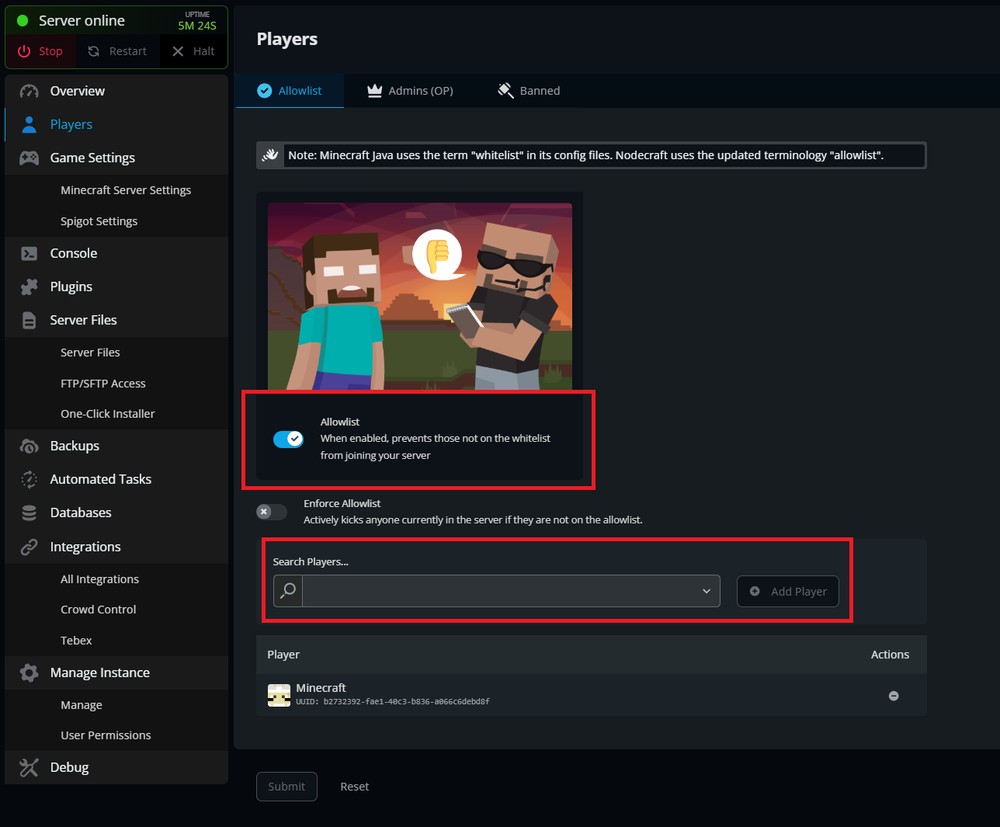
Open the Nodecraft Pro Panel for your Minecraft: Java Edition server.
Navigate to the
Playerstab located on the left-hand side.Access the
Allowlisttab on the top of the Players section.Enable the Allowlist via the available toggle.
Search and add the player username(s) that you want to allow to join your server.
 Note: If you would like to kick all currently connected players who are not added to the game's whitelist, toggle on the
 Enforce Whitelist setting.
You can also manage the whitelist in-game as long as you've given yourself OP permissions. This can be done using the commands below:
/whitelist add <username>/whitelist remove <username>
Conclusion
Setting up and managing a whitelist on your Minecraft server is a simple yet effective way to control who can join your world. It’s ideal for creating a private server for friends and family or maintaining a secure environment for your community, making the whitelist feature an invaluable tool.
Ready to take your server management to the next level? Start your journey with Nodecraft's reliable Minecraft hosting today!
Need Help?
If you have questions or run into any issues, our support team is here to help! Reach out using the support widget on our website or visit our support center for further assistance.