Uploading your Single Player World to Your Private Dedicated ARK Server
This guide will show you how to take the files from a singleplayer ARK: Survival Evolved game, and set them up on a Nodecraft multiplayer dedicated ARK server.
Once installed on a multiplayer server, your friends will also be able to join and make their own characters too, and you will also still keep all the progress you made in your single player game. You will still keep all the levels on your character, all the buildings you built, and all the dinos you tamed.
Find your Single Player ARK: Survival Evolved Files
On the computer where you've been playing a single player game, start up the Steam Launcher. In your game library, find ARK: Survival Evolved in the game listings, and right click on ARK: Survival Evolved.
In the small pop-up menu that appears, click on "properties" at the bottom.

On the new window that appears, click on the tab along the left side called "installed files", and then click on "browse".

And here you will find all the files for the Ark game client on your local computer, along with the singleplayer save information.
Finding your Save Game Information
In the files on your local computer for your singleplayer game, click on the folder shootergame. Inside that folder, will be a folder called saved. That folder contains the save game information for your singleplayer game, and the config files.
There will be folders for each of the maps you've been playing on in singleplayer. Each map folder contains it's own separate player and tribe information, for each player or tribe created on that map.
If you've just been playing on TheIsland map, then the folder labelled SavedArksLocal contains TheIsland map. If you've been playing on any expansion maps, then there will be a folder that begins with that map name as well.
A Ragnorak map will be in a folder called RagnorakSavedArksLocal for example. Procedurally generated maps will be in a PGArks folder.
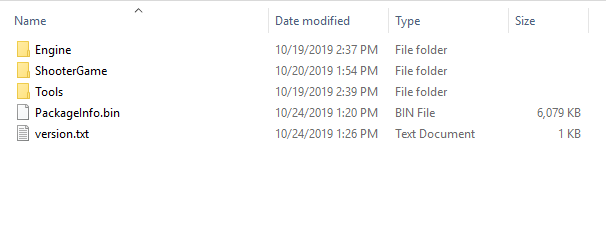
Below is a sample screenshot of some of the files usually found in the SavedLocalArks folder, with "TheIsland" map.

LocalPlayer.arkprofile is your main player save information in the single player game.LocalPlayer.profilebak is a backup copy of your character information made by the game automatically.
XXXXXXXXXX.arktribe is your tribe information, which gives your ownership of all your dinos and structures. XXXXXXXXXX.tribebak is a backup copy of the tribe information made automatically by the game
NOTE: The XXXXXXXXXX in the ARK Tribe file names is the "PlayerID" which is an internal ID number used by ARK. This is completely different from your Steam64ID number.
TheIsland.ark is your main world save.
The files that begin with TheIsland followed by numbers are previous saves made when you exited and shut down your singleplayer game.
If you've made any paintings on a map, they are contained in the ServerPaintingsCache folder.
Files to Copy and Move
To transfer your character, tribe, and world, you will need LocalPlayer.arkprofile, XXXXXXXXXX.arktribe, and the map save (in most cases, TheIsland.ark), and all the files in your paintingcache if you want to bring those too.
Some of those files will need to be altered, but you will need those as a starting point.
In the Config files folder inside Saved, you also might want to copy the config files GameUserSettings.ini, Game.ini, and Engine.ini. You won't be able to use those config files as-is, but you might need the information inside of them later on.
Setting up your Nodecraft ARK Server
On the dashboard of your Nodecraft account, create a new instance and choose ARK: Survival Evolved to be installed.
When it's done with the installation, you need to make the server ready for your singleplayer game to be uploaded.
Install Matching Mods
If you were using any Steam Workshop mods on your singleplayer game, then you will need to install those onto the multiplayer server before you try to load the save file from your singleplayer game.
If the mods aren't already installed, when it loads the save file from your single player game, all the modded content will be removed. Any items, engrams, dinos, or building items added by mods are stripped out on loading if the mods aren't already installed. Installing the mods beforehand should allow the save file to load correctly, and items won't be missing.
We have a guide on how to install mods on your Nodecraft server.
Change the Config Files
Don't try to copy the entire config files directly from your singleplayer game, that is probably going to end in disaster. There are settings specific to a multiplayer server that aren't in the singleplayer server config files.
It's best to use the config files from your singleplayer game only as a guide, and manually copy the individual settings over, one at a time. There's a way to make copying the settings a little faster though, there is a search feature!
When you are editing the config files in the Nodecraft server files, if you hold ctrl and press f, you open a search window at the top of the window where you are editing the config file. Type in a part of the name of the setting you want to find, and it will highlight it throughout the config file. This makes it much quicker to find settings so you can change them.
Uploading the Files to Your Server
The files you copied earlier need to be moved to the ShooterGame/Saved/SavedArks folder on your Nodecraft ARK: Survival Evolved server.
We recommend that you zip the file up using a zip utility before you try uploading them. You can either user the drag-and-drop feature in the server files section of the Nodecraft Pro panel, or you can use an FTP program to move the files to the server.
Rename Player Profile
In the map folder for your singleplayer game, the player information for your character is simply called LocalPlayer.arkprofile. On a multiplayer server, each player needs a different label (they can't all be called LocalPlayer).
On a multiplayer ARK server, each player's profile is labelled by a unique ID number on Steam called the Steam64ID. If you don't know what your Steam64ID number is, we have a guide on how to find your Steam IDs.
NOTE: The Steam64ID is different then your "PlayerID" which is an internal ID used by ARK.
Once you have your Steam64ID, rename your LocalPlayer.arkprofle, and change the LocalPlayer part of the file name to your Steam64ID.
Do NOT Rename the .arktribe File
The file that contains your ARK tribe information, which has 10 digits and ends in .arktribe, should not be renamed with your Steam64ID. That 10 digit number is your UE4 player ID number, used internally by ARK. If you leave it alone, the game should be able to figure out that you belong to that tribe, and automatically include you when you load into game.
Load Into Your Game
If everything has been done right, you should be able to connect to your muliplayer ARK server, and the game will check your Steam account, then find the .arkprofile that matches your Steam64ID.
When you load into the server, you should see the same world from your singleplayer game, with all the buildings you built, and all the dinos you have tamed! You should also automatically be part of the same tribe you were before (the only tribe that existed on your singleplayer game).
Sweet. Now you can get back to the fun stuff, actually playing the game!
Troubleshooting Tribes
Sometimes when you follow the steps above, when you join the game, you will find all the stuff there: your world is there, and all the structures you built, and dinos you tamed in your singleplayer game are there.
But you can't do anything with any of it. You aren't part of the tribe anymore, and none of it belongs to you now. You can't open any doors, boxes, or ride the dinos. If dinos were left on "aggressive" or you hit one of them, they'll attack you instantly.
This sucks. A lot.
There's a fix for this though. You can use admin commands to takeover the old tribe and get control of all your stuff back. Below are the steps to do that.
Enable Cheats on Your Server
Connect to your ARK server. When you load into the game, press the tab key to open the console window in game.
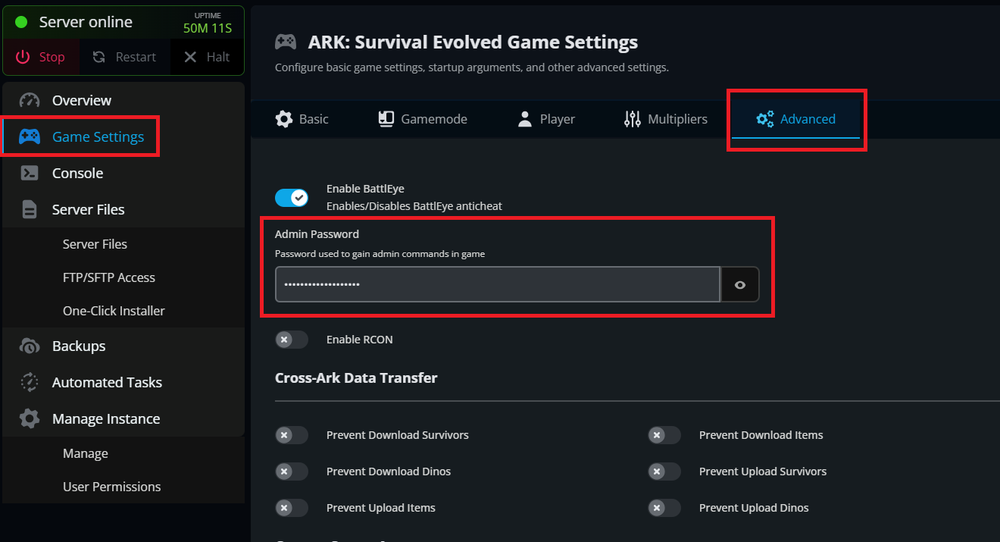
Enter the following command to activate "cheats" in game. You need to have set an admin password for your server beforehand to turn on cheat mode:
enablecheats (admin password)The admin password for your server can be set on the Nodecraft Pro panel on the "Game Settings" tab, then the "Advanced" tab. Make sure to hit the save button at the bottom of the page afterwards, and then restart the server. You can also set the admin password in the GameUserSettings.ini file too.
If done right, you are now an admin!
Use the SetCheatPlayer Command
Press tab again, and type this command (NOTE: for this command, you don't have to type cheat or admincheat before it as you do for most cheat commands):
setcheatplayer 1or
setcheatplayer trueThis turns on a special view in game that shows you a ton of information in an onscreen HUD.

Now when you look at any structure that belongs to a tribe, you will see a "Team" number towards the bottom of the screen, like in the screenshot above.
That is the UE4 ID in ARK for your old tribe. You will need that information for possible fixes. To turn off the HUD, use the same command setcheatplayer but with zero or false after it.
Use the TakeTribe Command
Use the admin command taketribe to automatically take ownership of everything in that tribe (the one that used to belong to you in your single player game), with the following command:
cheat taketribe (tribeID)tribeID is the team number from the previous section, where you turned on the setcheatplayer HUD.
Wham. All the stuff from the old tribe is now yours again.
Need Help?
If you have questions or run into any issues, our support team is here to help! Reach out using the support widget on our website or visit our support center for further assistance.