Adding Mods to your Starbound Server
Get the Mods
Non-workshop mods are installed the exact same way on the server as on your computer; simply use the Server Files on the left side of your Nodecraft Pro panel to access the server's mods folder. The easiest way to get Steam Workshop mods is described below, and starts with subscribing to the mods in Steam Workshop and letting Steam download them automatically to the client on your local computer.
Subscribing to the Mods
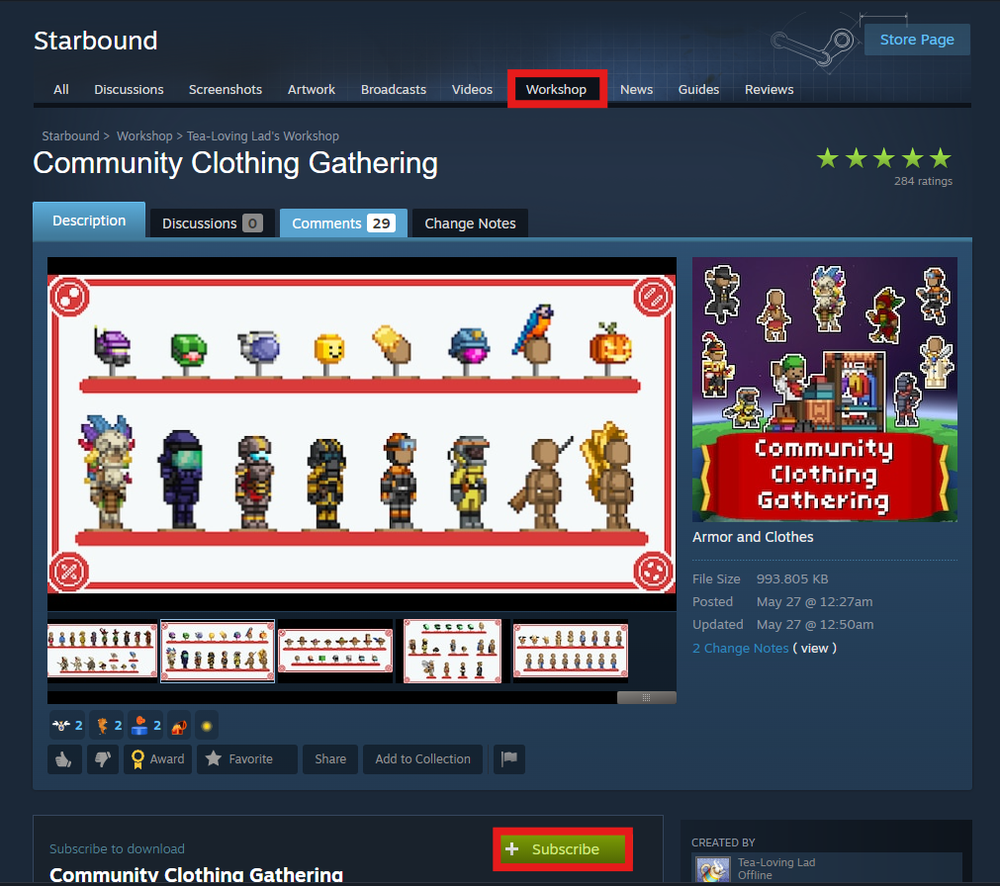
Navigate to the workshop for Starbound on Steam, find the mods you're interested in, and click on them to open up their workshop page. Click the green "+ Subscribe" button. It's that simple!

When it's subscribed to, the button changes to say "Subscribed" with a checkmark, and Steam has begun to automatically download the mods in the background to the local computer files. For a large number of mods, you might have to wait a little while for Steam to finish downloading them all.
Preparing the Mods to Upload to the Server
To find where Steam stores the mods it just downloaded, please do the following:
Right-click on "Starbound" in your game library, and the menu shown below will pop up. Click on "Properties" at the bottom.

On the next pop-up window, click on the "Installed Files" tab across the top, and then on "Browse Local Files".

You will see this view of the game files on your local computer, as shown below. To get to where Steam hides the mods, click "Steamapps" in the directory bar.
NOTE: In the screenshot below, you will also see a "mods" folder. That is NOT where Steam stores the workshop mods that it downloads automatically. The "mods" folder is where you manually add your own mods, and after a fresh install this folder is usually empty .

In the Steamapps tab, you will see a few other folders and you would need to select the "Workshop" folder next!

The "Workshop" folder is where Steam stores all the content that it downloads for all games. Click on the folder to open it. Then click on the folder named "Content".

Inside "Content" are folders with numbers on them. Those are the master ID numbers of Steam games.
The ID number for Starbound is 211820, so click on that folder. Inside there, you will see a folder for every mod that you subscribed to. The names of the folders are the Steam workshop ID for that mod. Inside each folder is a file called contents.pak.


Leave the mods in those numbered folders. Upload all the numbered folders for the mods you want to use to the server.
Upload the Mod Folders to the Server
We highly recommend using a program to package and compress the folders, such as a program that does .zip or .rar formats. This will make a single file that is often smaller then all the separate folders were (and smaller means faster upload).

Then upload that zip file to the server, to the folder /mods. You can use drag and drop in the file manager, or an actual FTP program to move the file. Lastly, unpackage the files.
We have support for unzipping file directly in the file manager view. You simply select a single zip format file, and an "Unzip" button will appear along the top of the file manager window. A similar button for .rar format will appear if you select a .rar file.


Use the Nodecraft Pro Panel to Rename Files
The last step before the server can actually use the mods, is the file inside every numbered folder needs to be moved out of that folder and directly into the /mods folder. The server will not load any files inside other folders inside /mods. The problem with that is, they're all named the same exact name: content.pak.
In the panel's Server Files, this will cause them to overwrite each other when you start moving them (move 20 files with the same name, and when you finish, there's only 1 there. A file that was overwritten 19 times). So they all need to be renamed something unique. The usual method is to rename them to the workshop ID number (the number that the mod folders are named).
If you have a lot of mods, this will take a while, and it's kind of tedious. So, here at Nodecraft, we have a magic button that does it all for you. Seriously, magic button.

After uploading the mod folders, go to the "Steam Workshop Collection" section of your panel, located underneath the Game Settings tab. Then, simply click on the blue button labelled "Steam Workshop Fix". This will:
take the
content.pakfile out of every numbered mod folder.automatically re-name it to the workshop ID number.
then move them directly into the
/modsfolder.When it finishes, the numbered mod folders that were uploaded should be empty, and they can be deleted later on if you want.
So, click button. Boom, done. Time to play.

If you don't have a magic button that does this for you (ie, you're trying to set up your own server at home), then all the content.pak files needs to be renamed and moved manually. We highly suggest you use the Workshop ID numbers so you can tell what is what later on.
Restart the Server to Load the Mods
Restart the server, and it should automatically load every mod in the /mods folder. If there are any issues with a mod loading at startup, the Console section of the server will usually contain any error messages related to that.
Need Help?
If you have questions or run into any issues, our support team is here to help! Reach out using the support widget on our website or visit our support center for further assistance.