How to Install CounterStrikeSharp and Metamod
Installing CounterStrikeSharp and Metamod on your Counter Strike 2 dedicated server is the first step toward adding plugin support. These tools act as a foundation that allows server owners to run custom plugins, add admin tools, enhance gameplay mechanics, and fine-tune the overall server experience. Getting these installed correctly is essential for a modded server environment.
Note: Be sure that your Counter Strike 2 server is fully stopped before making any configuration changes or setting updates!
Nodecraft Control Panel
Installing Metamod and CounterStrikeSharp is extremely easy at Nodecraft using our One Click Installer. If you don't have access to our Control Panel, please skip ahead to the Manual Installation section.
Install Metamod
Navigate to your Counter Strike 2 servers' dashboard.
Navigate to the One Click Installer tab on the left-side.
Select the Metamod branch.
Ensure that it's selected to Merge, and then click the Install button.
Install CounterStrikeSharp
Navigate to your Counter Strike 2 servers' dashboard.
Navigate to the One Click Installer tab on the left-side.
Select the CounterStrikeSharp branch.
Ensure that it's selected to Merge, and then click the Install button.
Manual Installation
Install Metamod
Download the latest version of Metamod: Source 2.X Dev Build for Linux.
Navigate to your Counter Strike 2 servers' dashboard.
Navigate to the Server Files tab on the left-side.
Navigate to the
/game/csgo/folders, and Upload the mmsource tar.gz file you downloaded.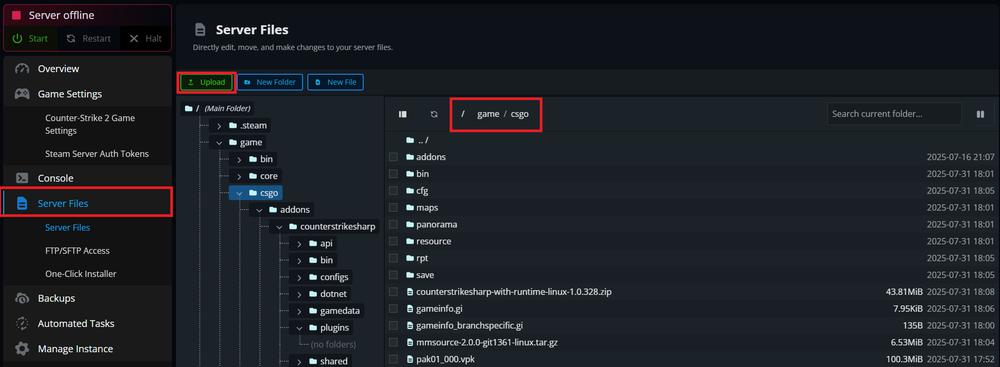
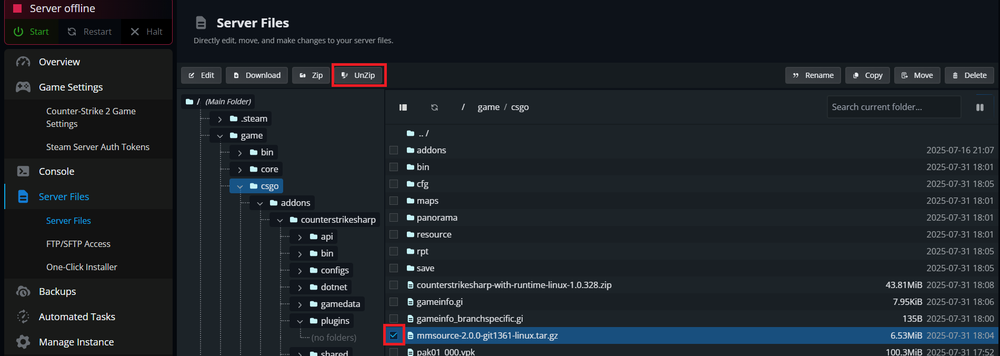
Select the mmsource tar.gz file and click the Unzip button.
Inside
/game/csgo/, locate and select thegameinfo.gifile and click Edit.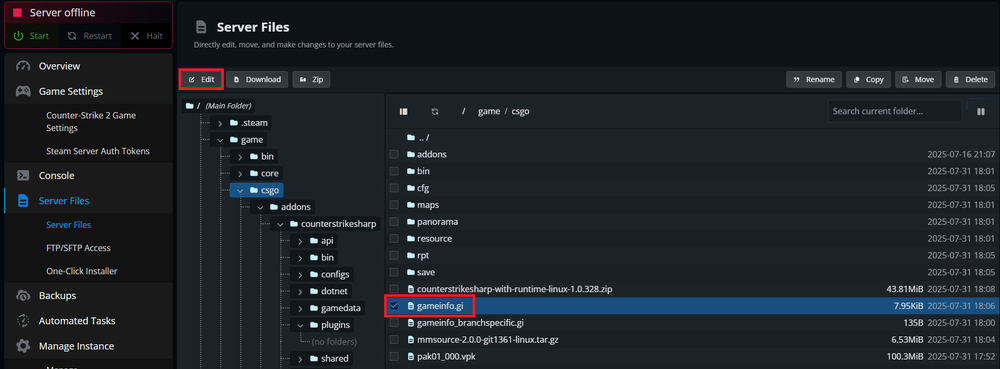
Create a new line underneath
Game_LowViolence csgo_lvand addGame csgo/addons/metamod.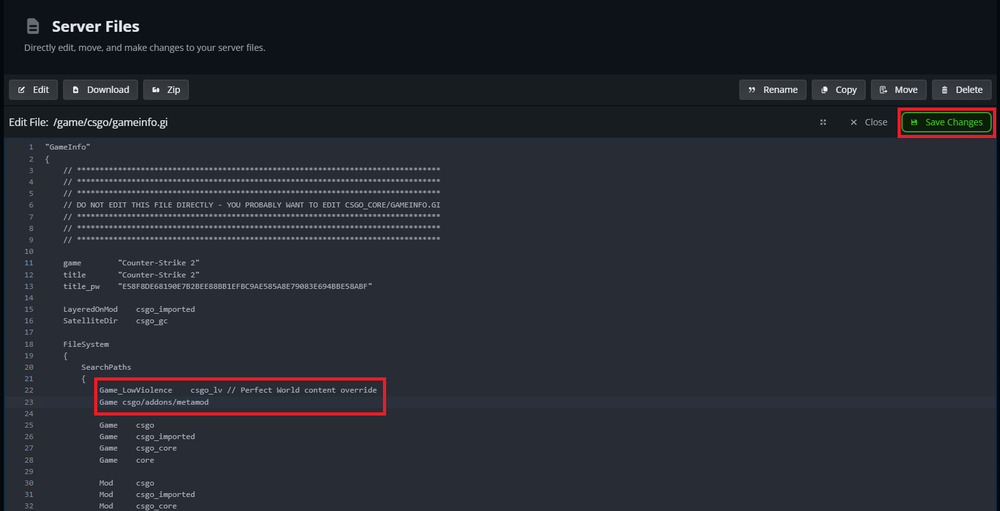
Click the Save Changes button.
Install CounterStrikeSharp
Download the latest version of CounterStrikeSharp with Runtime for Linux.
Navigate to your Counter Strike 2 servers' dashboard.
Navigate to the Server Files tab on the left-side.
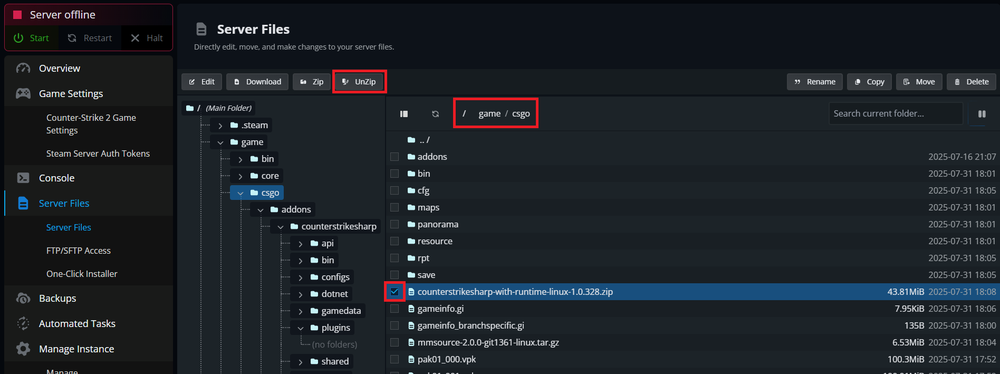
Navigate to the
/game/csgo/folders, and Upload the counterstrikesharp-with-runtime-linux.zip file you downloaded.Select the counterstrikesharp-with-runtime-linux.zip file and click the Unzip button.
Testing Installation
Start your server
Click the Console tab in the panel
Type the command
meta listand press Enter on your keyboard.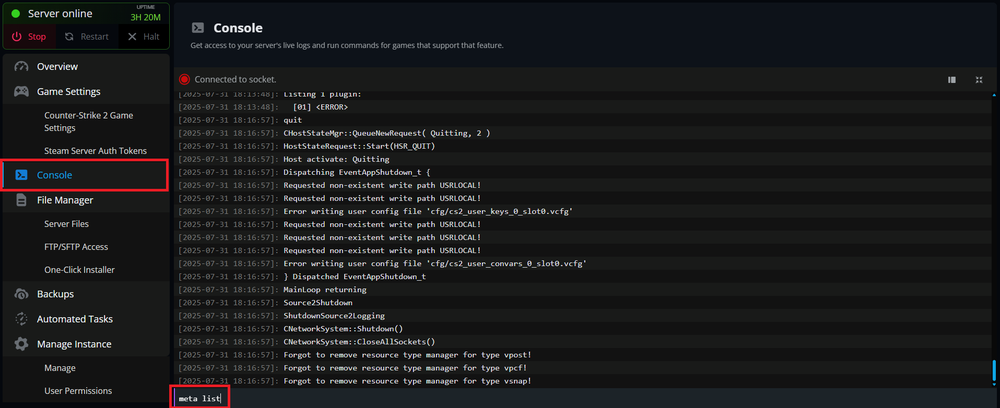
The following should appear in the Console and confirm that both Metamod and CounterStrikeSharp are installed correctly.meta list Listing 1 plugin: [01] CounterStrikeSharp (0.1.0) by Roflmuffin
Conclusion
With CounterStrikeSharp and Metamod successfully installed, your Counter Strike 2 dedicated server is now equipped to support a wide range of plugins and customizations. This setup opens the door to a more dynamic, community-driven experience tailored to your preferences. Be sure to explore available plugins and follow best practices for maintaining compatibility and stability as you build out your server’s features.
Need Help?
If you have questions or run into any issues, our support team is here to help! Reach out using the support widget on our website or visit our support center for further assistance.