Preparing Minecraft Modpacks: CurseForge Files
So you found a modpack from CurseForge that isn't in our installer and want to upload it to your server? Great! We can guide you on how to do that!
Before reading further, please take a moment to look at the server files inside of the zip file you downloaded. If there are only a few files that include a manifest.json, overrides folder, and modlist.html, then head over to this guide instead: https://nodecraft.com/support/games/minecraft/preparing-minecraft-modpacks-manifest-files
If not, then onward!!
Getting Complete Server Files
The great thing about CurseForge packs is that majority of the time, they will have all the files needed for a server!
Head over to the CurseForge page of the modpack you want to download. You can search for it on the CurseForge website here: https://www.curseforge.com/minecraft/modpacks We're going to use "Farming Valley" and "Enigmatica 6" for our examples throughout this guide. Click on the "files" tab, then scroll down until you see "Recent Files"

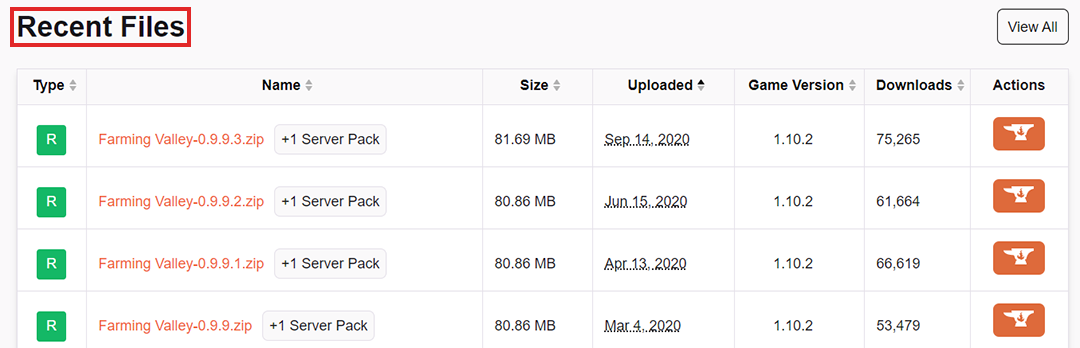
Notice how all of those have a little tag that says "+1 Server Pack"? That is exactly what we want! If a modpack doesn't have that, then there are no files for a server in it. Sometimes modpack authors push updates that are purely client-side only so there won't be any server files. Sometimes if the update was bugged, then they'll remove the server files. Usually if it is a bugged update, that will be stated in the changelog on that version.
By default, when you go to the "files" page, it will already be on the most recent release. If you want another version, simply click on it from the "recent files" list.
Download and Unzip
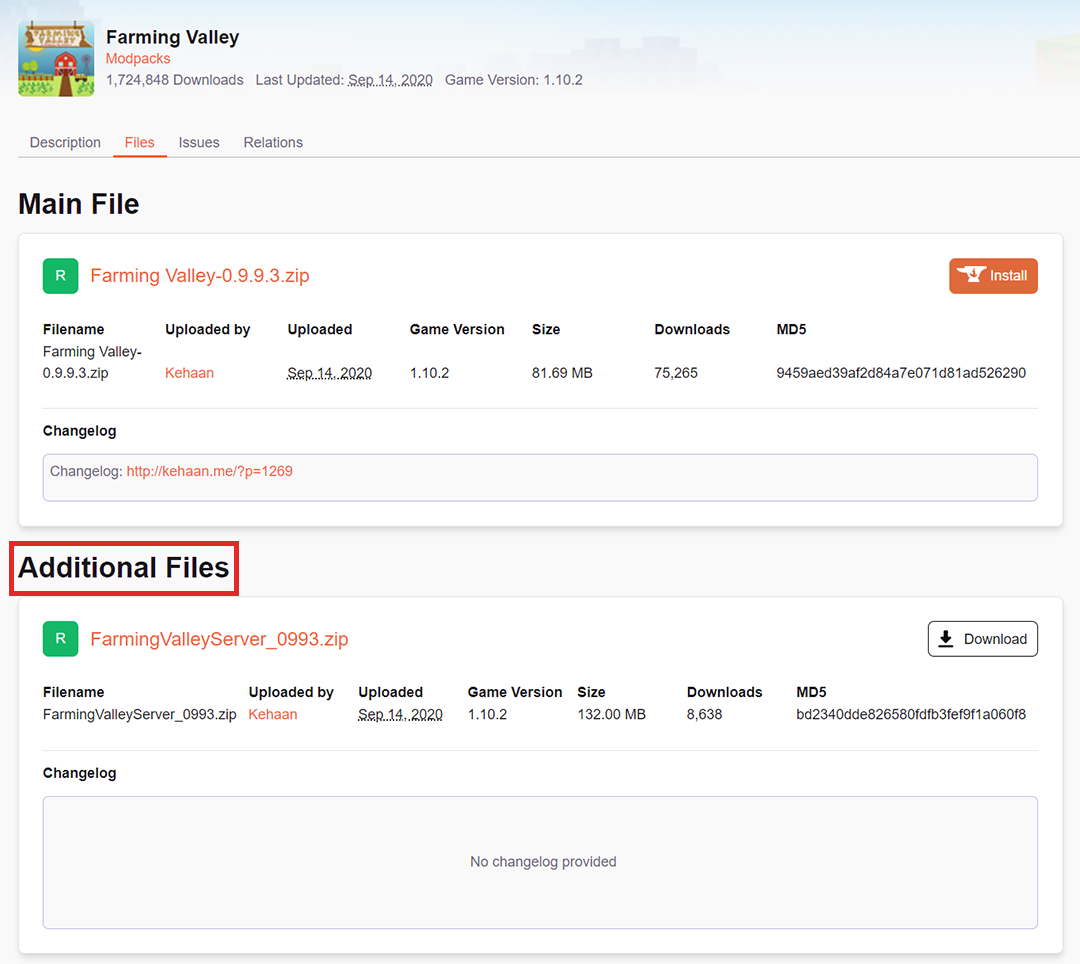
The server pack will be in "additional files." Click on the "download" button beside it to download it to your PC.
This will download a zip file. We prefer using 7-Zip for zipping/unzipping files, but you can use any zipping tool you'd like to unzip the file.
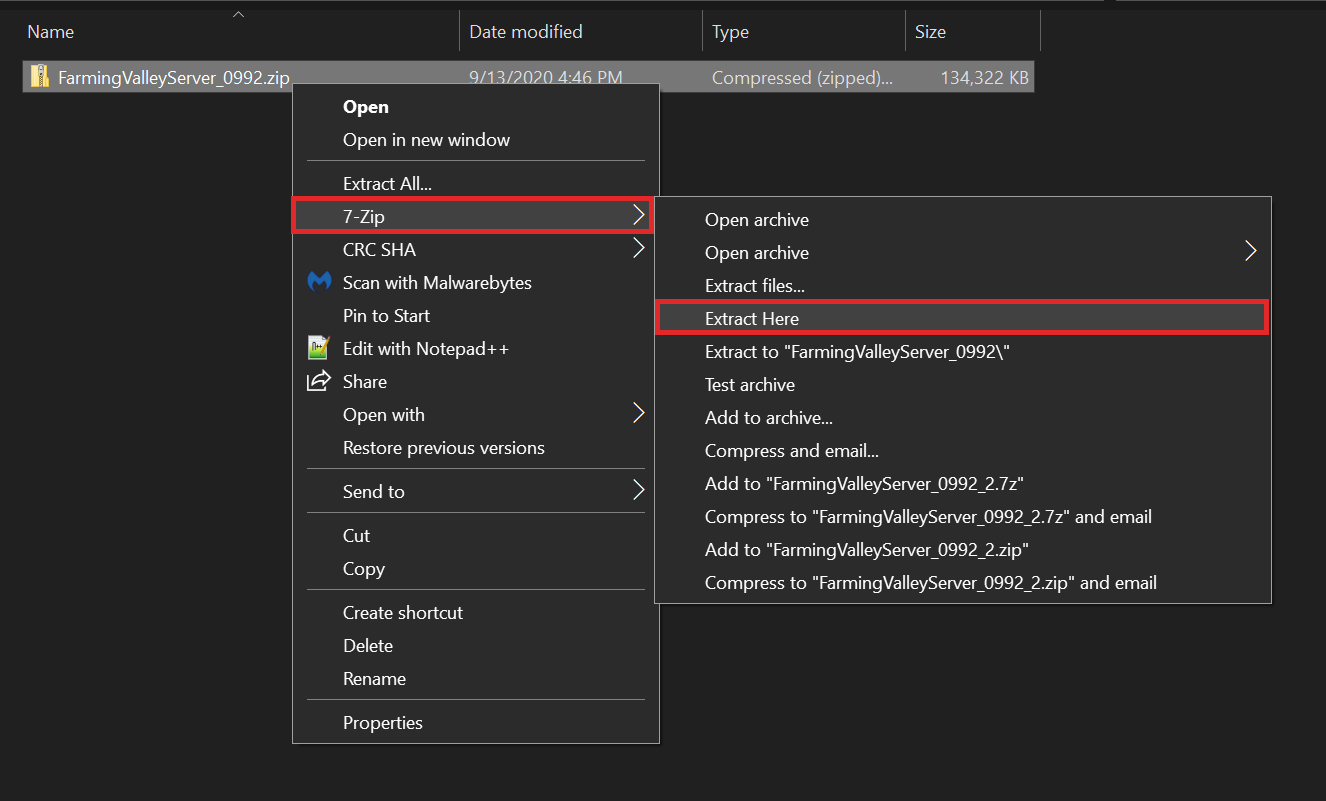
Note: It's a good idea to put the zip file into its own folder. Most times the files will already be in a folder inside the zip, but occasionally they aren't and then they'll get scattered everywhere when you unzip it.
Check for Minecraft and Forge .jar Files
If the a folder was extracted from the zip file, open it. There may be a folder inside a folder, too (folderception!). These are, in general, the files you want to see:
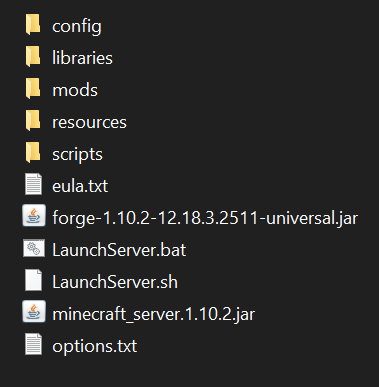
The first files to look for are the core Minecraft and Forge jar files. If those are present, then you can move on to the next step. If not, then we'll need to get them. Luckily, that is an easy process!
There should be some .bat files that need to be run. These are typically named along the lines of start.bat, launch.bat, and/or install.bat. Double click on them to run them. This will open a command line interface that spits out a bunch of information at a rapid pace. You don't need to pay much attention to what it's doing while it loads everything. Wait for it to finish (most of the time it will end on a screen asking you to agree to the EULA. It is complete when it gets to that screen.) then close the command line interface when it is done.
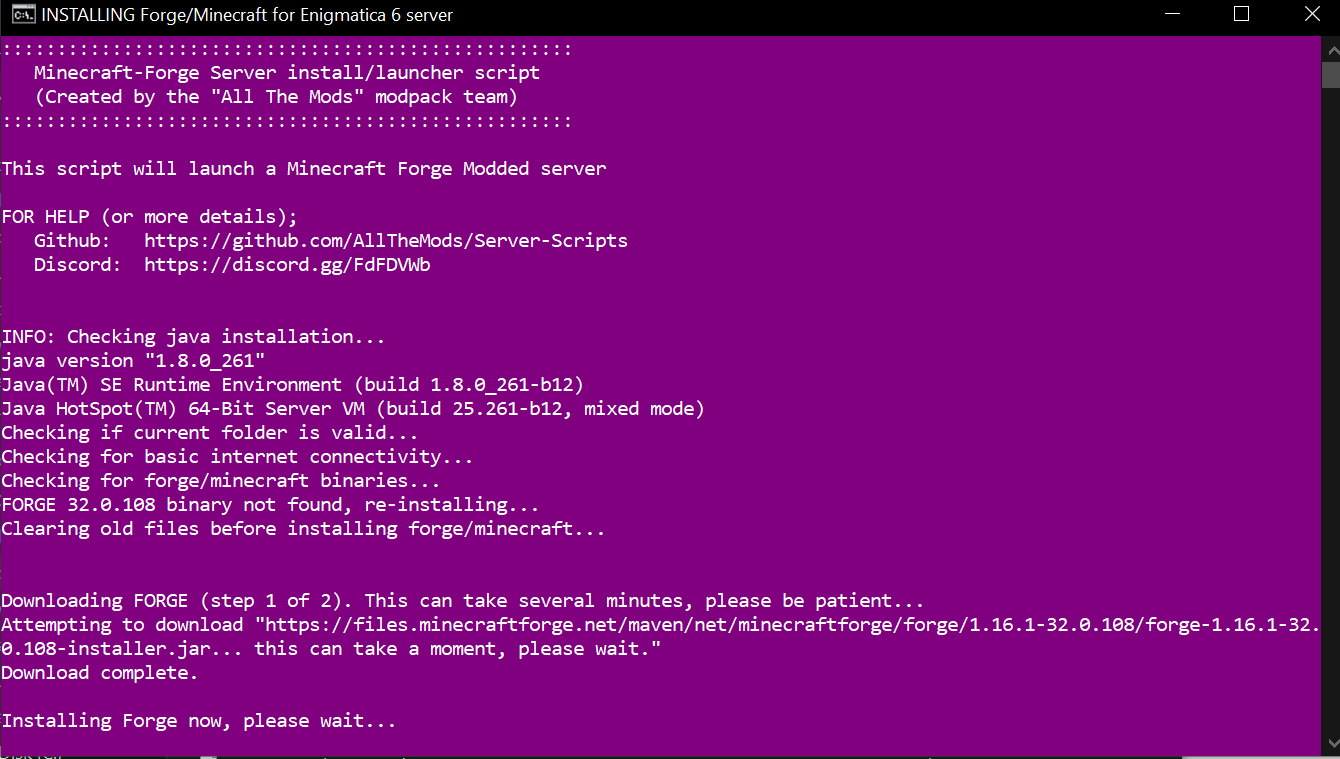
Now you should have a Minecraft jar file and a Forge jar file!
Optional step: Run the Forge jar This is something the server will do anyway, but if you want to speed up the process of the server going online, you can go ahead and run the Forge jar file so it creates all the files and folders it needs ahead of time.
Delete Unnecessary Files
This part is purely clean-up to keep your files organized and tidy. It isn't required at all, but it does make it easier to look through your server!
The following files can be deleted:
eula.txtstart/launch/install
.jarfiles.txtfiles.shfiles.batfiles.mdfiles.logfiles.exefiles.jsonfilesimage files, such as
.pngserver.propertiesOnly if it wasn't there first! As in, when you ran the.bator the Forge jar, it generated one. If it was there already, leave it in.
Delete Redundant Backup Configs and Mods
Most modpacks are going to include a couple of backup mods that are redundant to have on servers and will eat up SSD space extremely fast. We get rid of these on all modpacks we include in our installer and highly recommend it on any modpacks you're going to install. These are ftbbackups and aromabackup. Sometimes it'll just be one or the other, sometimes both.
Hint: Use the Backups feature on the NodePanel instead. You can even use the Automated Tasks feature to do it at certain intervals!
Aroma Backup
Open the config folder. Aroma may have a folder of its own called aroma1997. If it does, open that up and locate the aromabackup.cfg file. Delete that file. If it isn't inside a folder, scroll down past the folders until you find it and delete it.
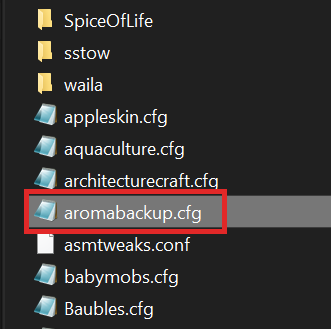
Back out of the config folder until you're in the main folder again, then open the mods folder. Locate aromabackup.jar in the list and delete it. Sometimes it will simply be named backups.jar.
Note: Sometimes the mod won't exist, but the .cfg file does. Make sure you still delete the .cfg file anyway!
FTB Backup
FTB Backups used to be done only with the FTBUtilities mod, but within the last couple of years a separate mod just for backups has been made called "FTBBackups". Some modpack authors double down by having the FTBBackups mod included as well as backups enabled in FTBUtilities. We'll have to look for both of these!
Open the
configfolder. Scroll down until you findftbbackups.cfgand/orftbutilities.cfg. Very rarely, it may be a.tomlfile instead.Delete
ftbbackups.cfgif it exists.Right click on
ftbutilities.cfgand open it with a text editing program. We prefer using Notepad++, but you can use the default text editor that comes with your system. Scroll until you find a section labeled "backups", then changeB:enabled=truetoB:enabled=false. Save, then close. If it doesn't have a section for backups, then you don't need to worry about it!

Back out of the config folder until you're in the main folder again, then open the mods folder. Locate ftbbackups.jar if it exists and delete it. Sometimes it will simply be named backups.jar.
Zip, Upload, and Test
You're now ready to get this modpack on your server!
If you haven't created an instance for Minecraft yet, go ahead and do that now. Not sure how? Not to worry, we have a quick guide you can check out here: Instances Guide
In the file manager, click on the "apply" button beside "select all" at the bottom, then click on the "delete" button. The file manager should be completely empty after doing this.

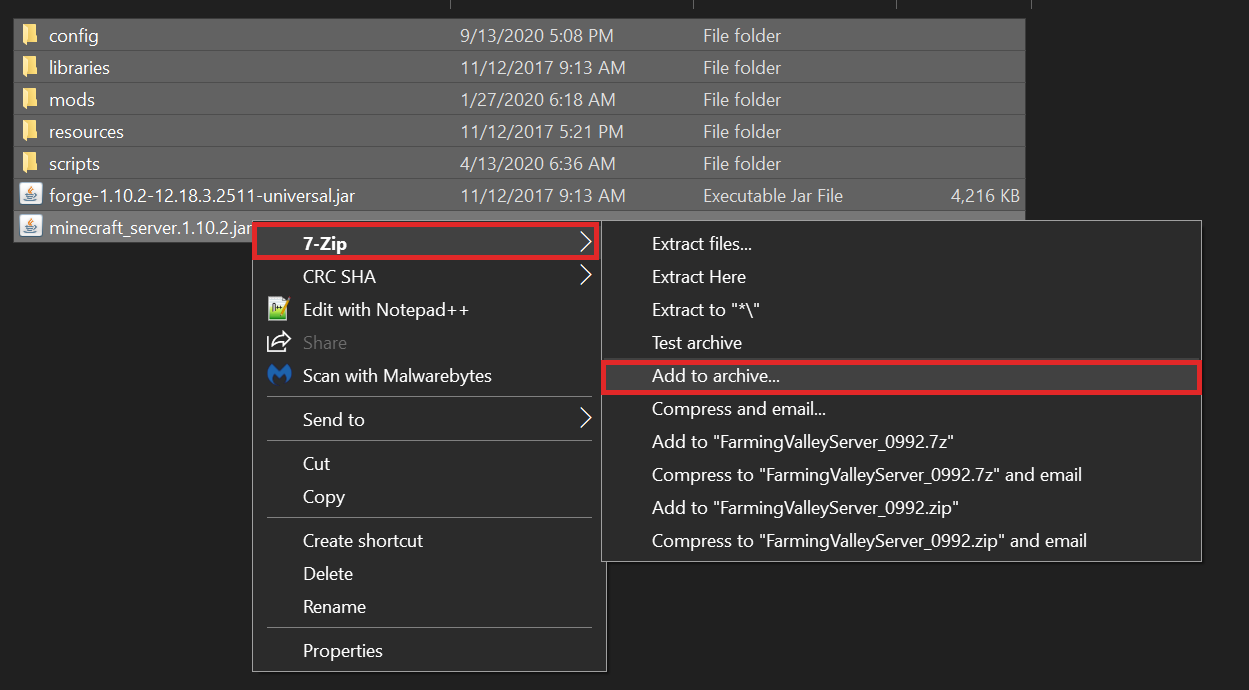
In the main folder of the modpack on your PC, select all the files. Right click on them and zip them up.
Upload that zip file to your server. That can be done by clicking the "upload" button in your file manager, dragging and dropping the file directly into the file manager, or via FTP.
FTP is generally the best way to upload files, especially large ones. FTP breaks the file up into small portions and sends each portion one at a time. It keeps tracks of what's been sent, checks it off a list when it gets to the other ends okay, and will resend if one gets lost. It also double-checks the integrity of what it sends, and will resend if any are corrupted.
Here is a link to our guide on how to use FTP: Basic FTP Tutorial
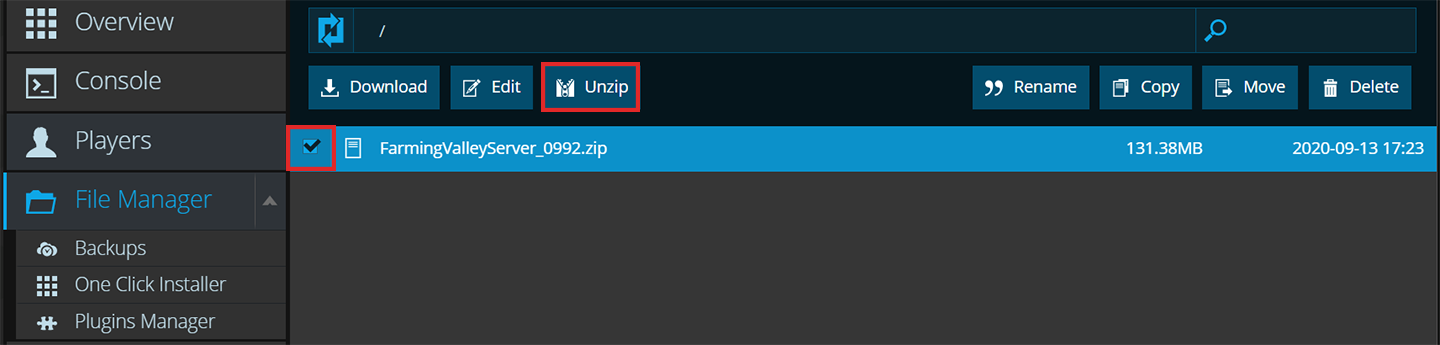
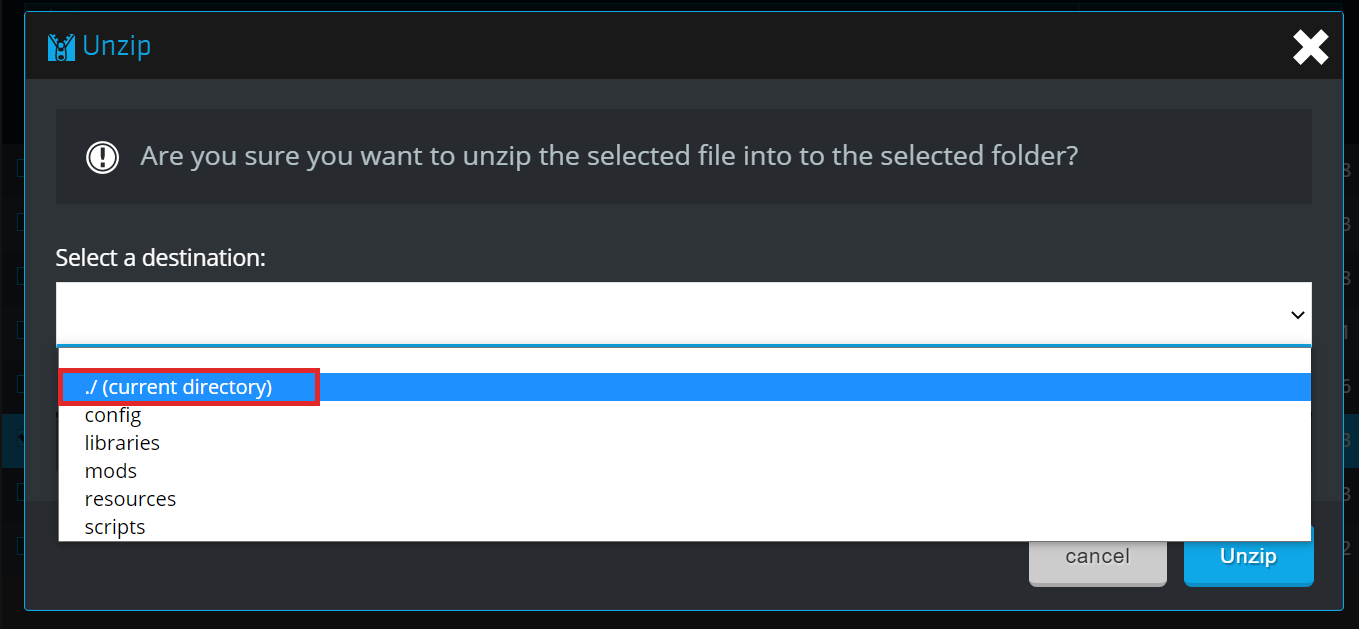
Once uploaded to the server, select the zip file and click on the "unzip" button that appears. Select "current directory" from the drop-down list that appears.
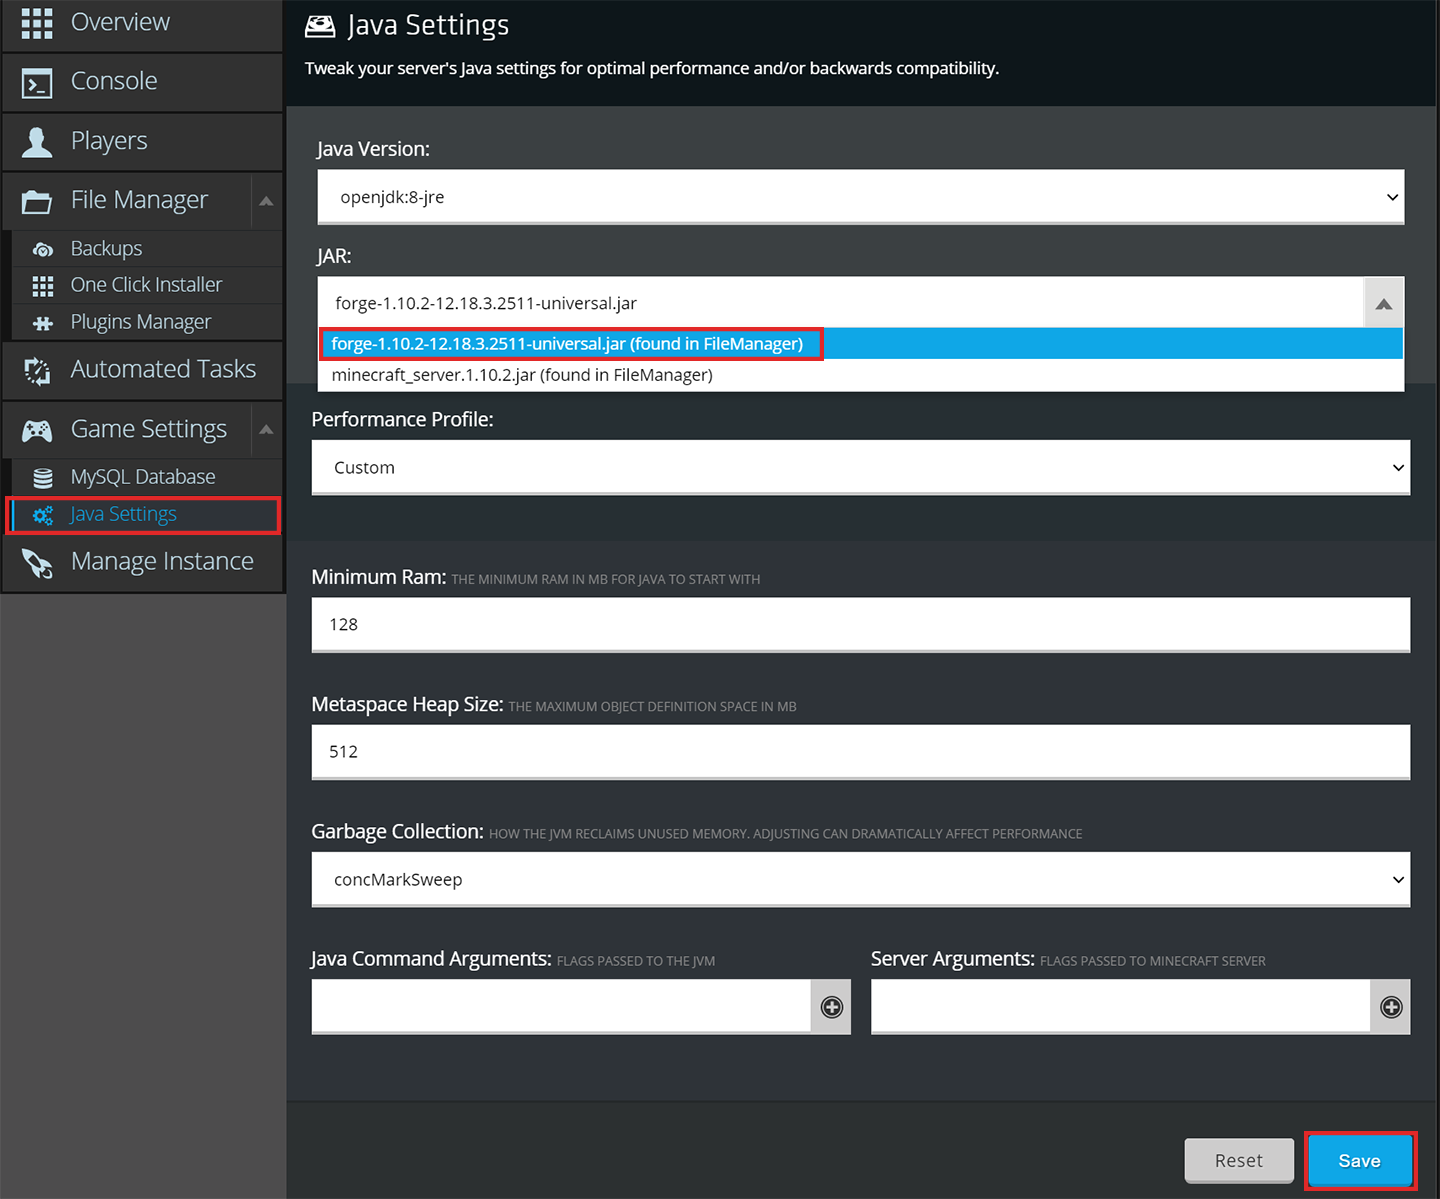
Head over to the "Java Settings" page on your panel. Under the "JAR" section, select the drop-down menu and choose the Forge jar file. Make sure you click the save button!
Finally, turn the server on! If all the steps were followed, then it should load up the modpack and go online!
Need Help?
If you have questions or run into any issues, our support team is here to help! Reach out using the support widget on our website or visit our support center for further assistance.