How to Become Admin on your SCP: Secret Laboratory Server
In this guide we are going to go over how you can add yourself or someone else as an admin to your SCP Secret Laboratory server. Adding yourself or someone else as an admin will allow the use of the Remote Admin functions built into the game to moderate or control your server.
Adding an admin
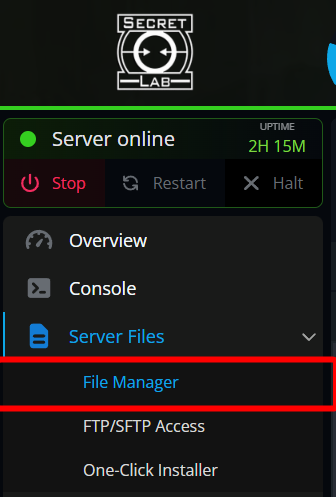
Open your dashboard
Locate your SCP server and click on the panel button.
Once your panel, stop your server then navigate to your File Manager.
Once on the file manager, navigate to following folder:
/.config/SCP Secret Laboratory/config/<ServerPort Number(Typically 7777)>/.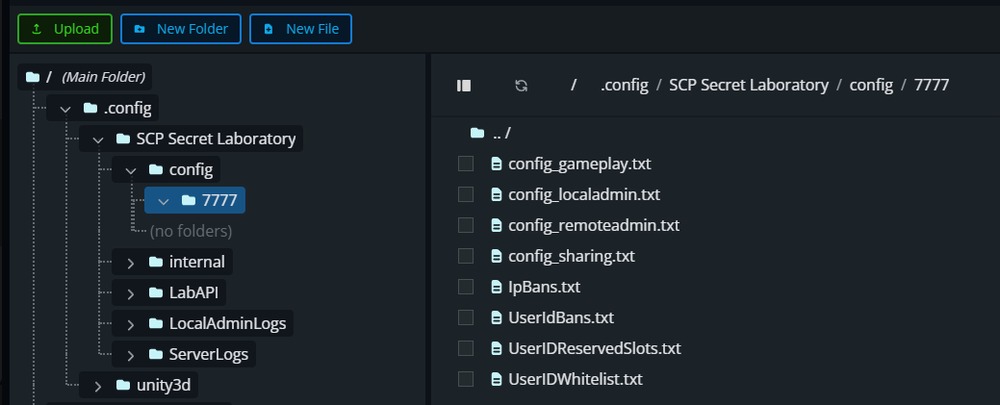
Once in the config folder, open the file config_remoteadmin.txt by double clicking on it.
For the next part you will need your SteamID64 which can be looked up on SteamID.net.
Once on the website, enter your steam username and click lookup.
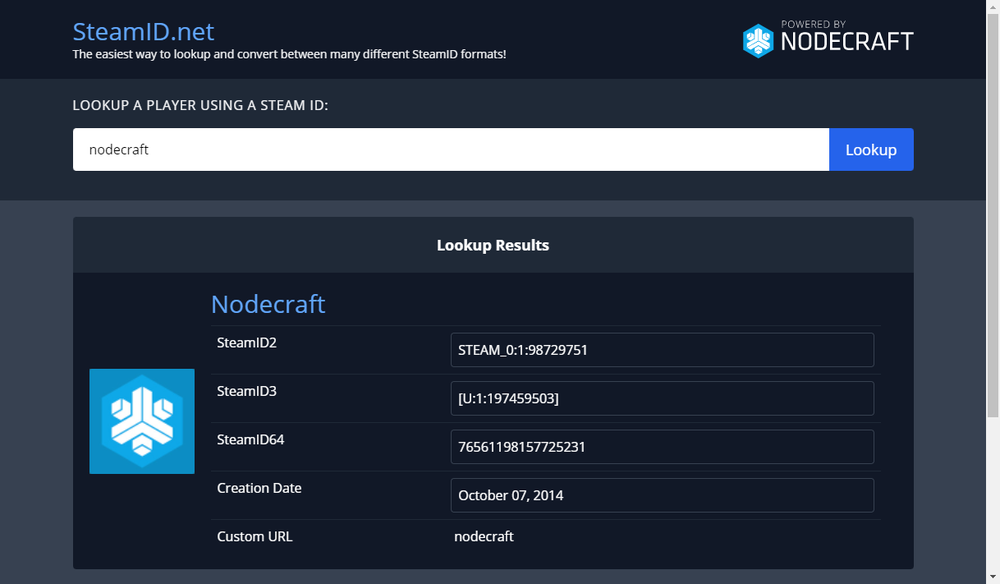
Once looked up, your SteamID64 will appear in the box, copy that for the next step.
Return to your file manager with the open config_remoteadmin.txt file.
Once in the config_remoteadmin.txI file, locate Members section.
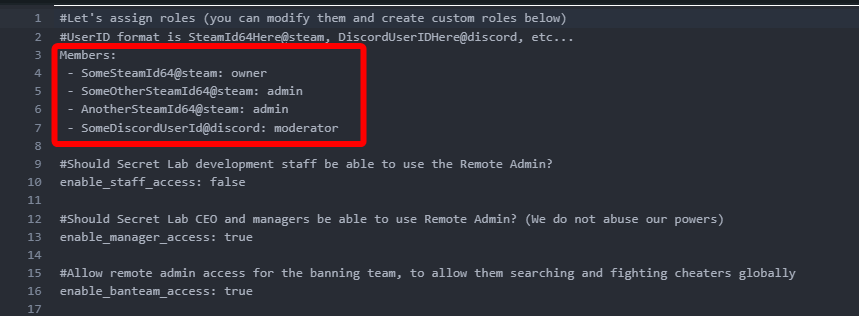
If you want to add yourself as an admin, replace <SomeSteamID64> with the value you copied. And it should look like this.

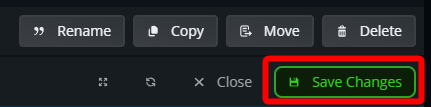
Once you have added yourself or others as the desired permission group, click save changes in the upper right corner.
Start your server
Conclusion
You have now added yourself or others as an admin or moderator. WIth this you will now have access to the in-game remote admin menu to control and moderate your server.
Need Help?
If you have questions or run into any issues, our support team is here to help! Reach out using the support widget on our website or visit our support center for further assistance.