


How to Enable the Minimap on a Project Zomboid Server

In this guide we are going to cover how you can enable the minimap on your Project Zomboid server. Enabling this option makes a minimap window available to players, making it easier to navigate without opening the full map.
Enabling the Minimap
Open your Dashboard.
Locate your Project Zomboid server and click on the Manage button.
Once on the panel, under Game Settings click on Sandbox Settings.
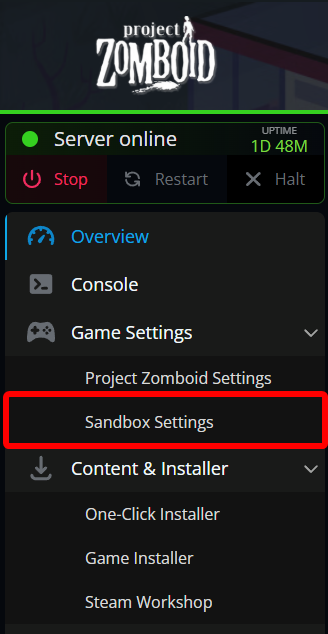
Go to the World tab.
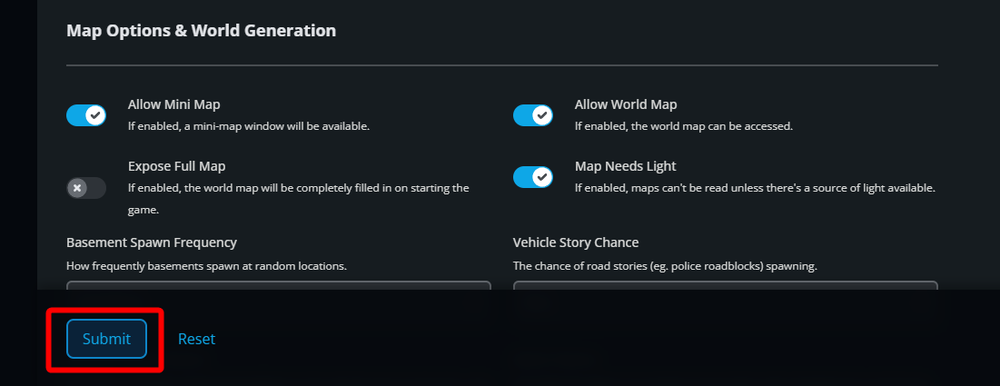
Scroll down to the Map Options & World Generation section.
Locate the Allow Mini Map option and turn it on.
Once the option has been changed, click the submit button.
Start/restart your server to apply the change.
Conclusion
You have now enabled the minimap on your Project Zomboid server. Players will now have access to a minimap to help them navigate while exploring.
Need Help?
If you have questions or run into any issues, our support team is here to help! Reach out using the support widget on our website or visit our support center for further assistance.