


Palworld Guild Roles and Permissions Guide

Palworld 1.0 added proper guild ranks and permissions, giving Guild Masters more control over who can manage members, build structures, and touch the all-important Palbox. It is much safer than trusting every new recruit with the keys to the kingdom.
How to Open the Guild Settings
Only players with the required permission can change guild rank settings.
Open the in-game menu.
Select Guild.
Select Guild Settings.
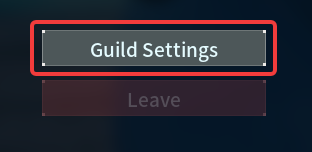
The Rank tab controls guild permissions. The Notifications tab controls which guild activity messages appear.
Palworld Guild Permissions Explained
Each rank can be given access to the following permissions:
Approve Player Requests: Accept players who request to join the guild.
Kick Player: Remove members from the guild.
Modify Rank Permission: Change which permissions are enabled for each rank.
Change Player Ranks: Promote or demote guild members.
Place/Remove Structures: Build and dismantle structures within guild bases.
Structure Security Setting: Change which ranks can access supported structures.
Place/Remove Palbox: Build or dismantle a guild Palbox.
Manage Base Pals: Assign and manage Pals working at guild bases.
Be especially careful with Place/Remove Palbox. Accidentally removing a Palbox is a very efficient way to turn base management into base rebuilding.
Default Palworld Guild Rank Permissions
Palworld includes four guild ranks: Guild Master, Sub Master, Member, and Guest. Each rank begins with its own default permissions.
Guild Master
The Guild Master has every permission enabled:
Approve Player Requests
Kick Player
Modify Rank Permission
Change Player Ranks
Place/Remove Structures
Structure Security Setting
Place/Remove Palbox
Manage Base Pals
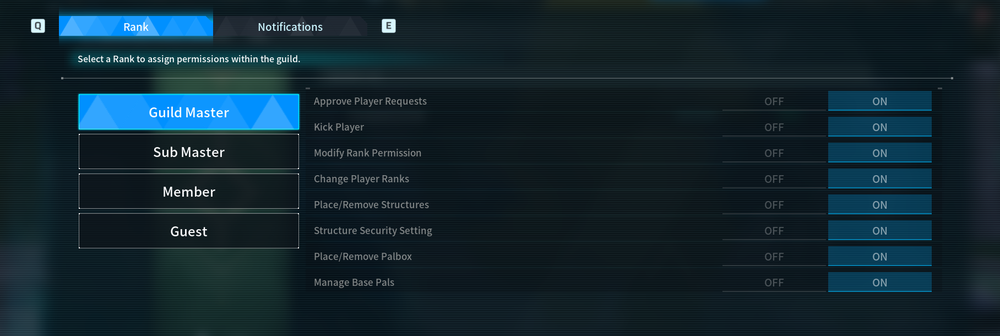
The Guild Master has full control over the guild and its permission settings.
Sub Master
The Sub Master begins with the following permissions enabled:
Approve Player Requests
Change Player Ranks
Place/Remove Structures
Structure Security Setting
Manage Base Pals
The following permissions are disabled by default:
Kick Player
Modify Rank Permission
Place/Remove Palbox
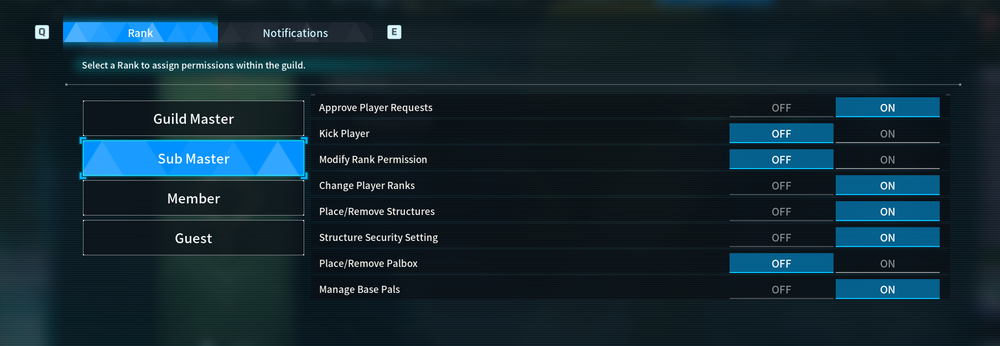
This makes Sub Master a useful rank for trusted administrators. They can help manage members and bases without automatically receiving complete control over the guild.
Member
Members begin with two permissions enabled:
Place/Remove Structures
Manage Base Pals
The following permissions are disabled:
Approve Player Requests
Kick Player
Modify Rank Permission
Change Player Ranks
Structure Security Setting
Place/Remove Palbox
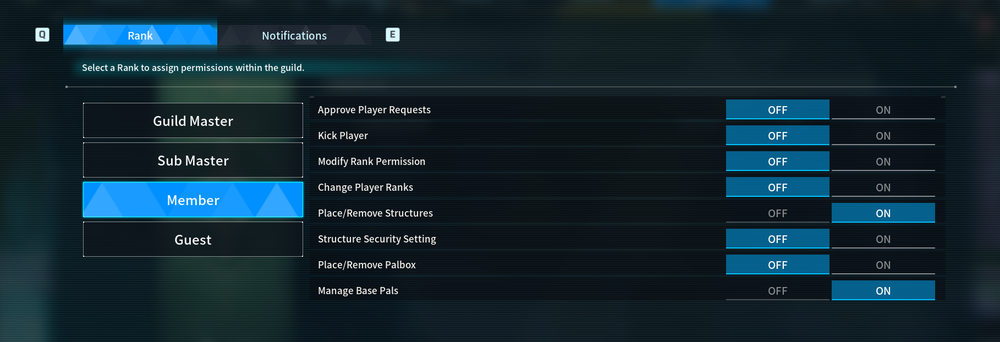
The default Member rank allows players to help build and manage working Pals without giving them administrative control.
Guest
Every permission is disabled for Guests by default.
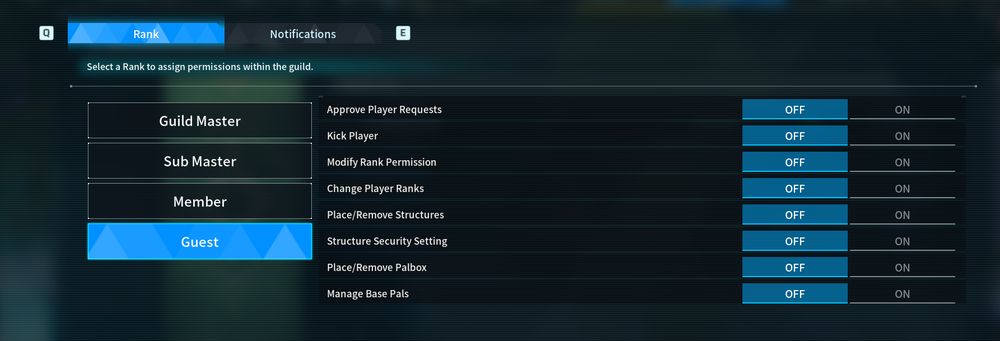
Guest is the safest rank for new or untrusted players. They cannot manage members, build structures, change security settings, manage base Pals, or interact with Palbox placement.
How to Change Guild Rank Permissions
Open Guild Settings.
Remain on the Rank tab.
Select Sub Master, Member, or Guest.
Change the desired permission from OFF to ON, or from ON to OFF.
Exit the menu after making your changes.
Players with Modify Rank Permission enabled may also be able to change these settings. Keep that permission limited to people you trust.
How to Change a Player's Guild Rank
Players with the Change Player Ranks permission can promote or demote guild members.
Open the Guild menu.
Select the guild member you want to manage.
Select the option to change their rank.
Assign the desired rank.
Use Guest for restricted access, Member for regular players, and Sub Master for trusted guild administrators.
Structure Security Settings
Certain structures can be restricted to specific guild ranks. A player needs the Structure Security Setting permission to change those restrictions. This can be used to protect important storage, equipment, or other supported structures while still allowing members to use the rest of the base. A player may still be blocked from a structure even when their rank normally has access to guild facilities. Check the security setting applied directly to the structure when troubleshooting access problems.
Guild Notification Settings
The Notifications tab includes four optional guild notifications:
Member Joined Notifications
Member Left Notifications
Member Login Notifications
Member Logout Notifications
All four notifications are disabled by default.
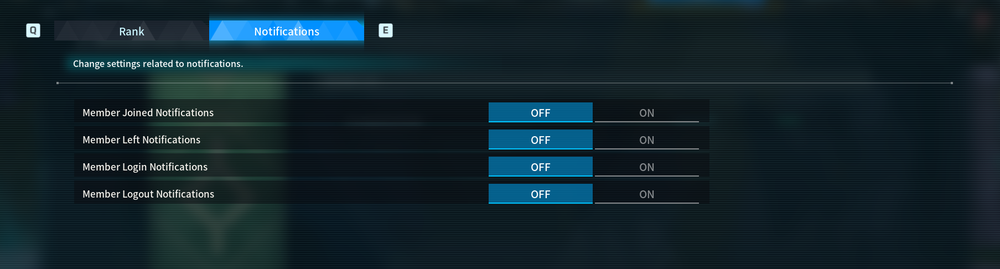
Enable the notifications that are useful for your guild. Login and logout messages can help smaller groups coordinate, but they may become noisy on a busy server.
Conclusion
Palworld guild ranks make it much easier to share a base without giving every member complete control. Start with the default permissions, promote trusted players gradually, and keep dangerous management permissions limited. A little permission setup now can save you from returning later to find that your base has become a scenic empty field.
Need Help?
If you have questions or run into any issues, our support team is here to help! Reach out using the support widget on our website or visit our support center for further assistance.