


How to Display Players on the Map on a Project Zomboid Server

In this guide we are going to cover how you can display players on the map on your Project Zomboid server. Enabling player map markers makes it easier to locate other players and meet up while exploring.
Displaying Players on the Map
Open your Dashboard.
Locate your Project Zomboid server and click on the Manage button.
Once on the panel look under game settings and click on Project Zomboid Settings.
Go to the Players tab.
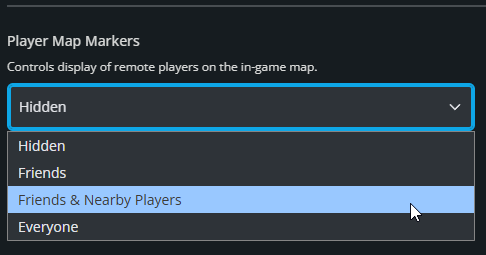
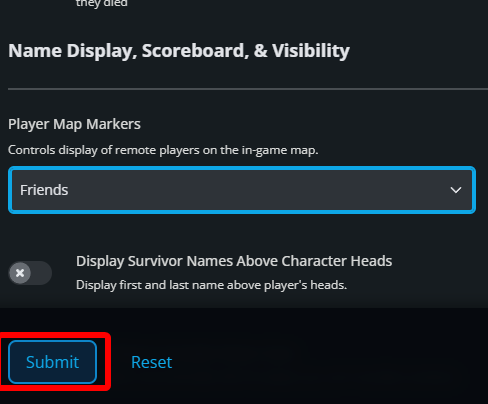
Locate Player Map Markers under the Name Display, Scoreboard, & Visibility section.
Click on the dropdown and select Everyone to display all players on the map. You can also choose Friends or Friends & Nearby Players if you want to limit which players are shown.
Once selected, click on Submit.
Start your server to apply the change.
Conclusion
You have now enabled player map markers on your Project Zomboid server. Players can now locate each other on the map based on your selected visibility option.
Need Help?
If you have questions or run into any issues, our support team is here to help! Reach out using the support widget on our website or visit our support center for further assistance.