


Change the Password on a Project Zomboid Server

In this guide we will be going over the process to change or set a password on your Project Zomboid server. A password is a great way to add a layer of protection to your server as it will stop anyone from being able to join unless they have the password. This means only those you give the password can join the server.
Changing/Setting the Password.
Open your Dashboard
Locate your Project Zomboid server and click on the Panel button.
Once on your panel, go to the Server Setting tab.
Once on the server settings page, location the password field under the Access & Security section.
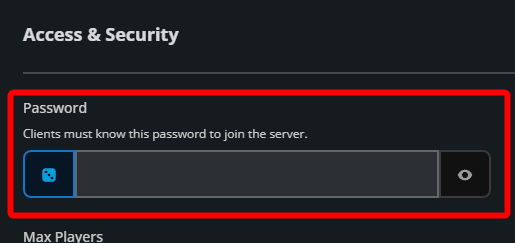
Enter a password that you would like to use. Alternatively, you can click on the dice icon to generate a random password.
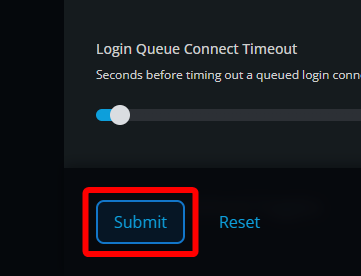
Once you have a password set, click on the Submit button at the bottom of the page.
Start/restart your server.
Conclusion
You have now changed or set the password on your server. From this point only those with the password will be able to join. This password can be changed again at any time with the same steps if you want a new password or you need to ensure one or more previous players can’t join.
Need Help?
If you have questions or run into any issues, our support team is here to help! Reach out using the support widget on our website or visit our support center for further assistance.