


How to Reset The Nether on a Minecraft Server

In this guide we are going to cover how you can reset The Nether on your Minecraft server. This process is pretty easy but can depend on if you are using vanilla or another 3rd party server software such as Spigot or PaperSpigot.
Resetting The Nether on Vanilla or Forge
Open your dashboard.
Locate your Minecraft server and click on the Panel button.
Once on your Minecraft server, stop your server then click on the Server Files tab.
Once on your file manager, locate the folder that matches your world name. If you have never changed worlds this should be World.
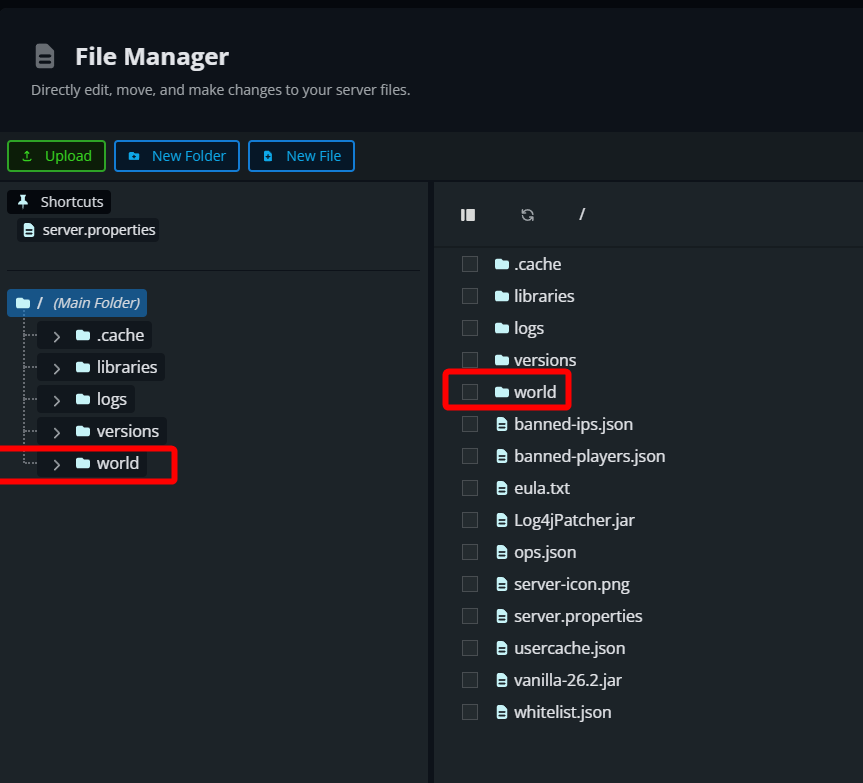
Open the world folder and inside navigate to dimensions/Minecraft

Delete the folder that says the_nether by selecting it and clicking delete.

Note: If you are on a Minecraft version prior to 26.1, you would delete the DIM-1 folder inside the world folder. There will not be a dimensions folder.
Start your server.
Resetting The Nether on Spigot or Paper
If you are using server software such as Spigot or Paper, the folder structure changes slightly but the steps are vastly the same.
Stop your server and open your File manager.
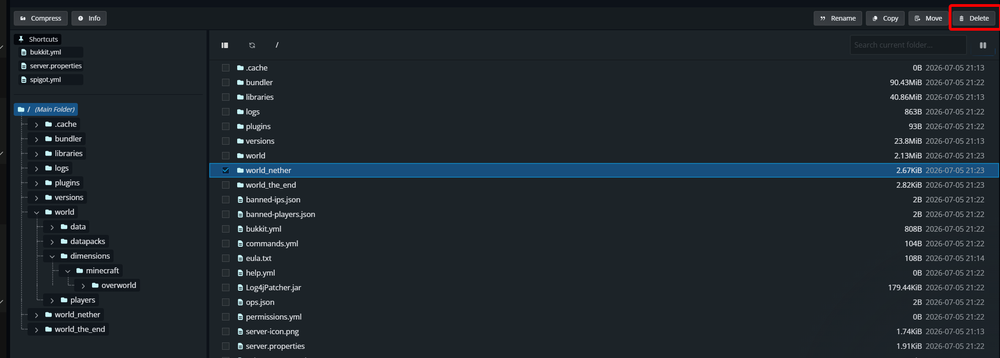
Locate the folders that start with your world name. If you never changed worlds this will likely be world.
Locate the folder that says world_nether, select it then click delete.
Conclusion
You have now reset the nether on your Minecraft server. With the nether reset it will regenerate as if you have never been in the dimension, however, it will not look any different as the same seed based on your world will be used.
Need Help?
If you have questions or run into any issues, our support team is here to help! Reach out using the support widget on our website or visit our support center for further assistance.